In my last article, I posted about how to make cool visual graphics for your blog posts. One of them was about Presentation Slides. Now how about hosting it? Where in the whole entire Internet would you find a place to host and display your presentation slides? There are several places but let us look into using Google Drive to display your Presentation Slides:
Google Docs (or Drive?) – Presentation
Ever since Google has switched from Docs to Drive, I do not know how else to define it. Anyway, Google Drive can be used as a place to host your Presentation slides. Follow these steps to help you upload or create one and display it on your Blog Post.
Step 1: Start with signing up at Google.com
You need a Google account anyways if you are going to start using Google Drive. If you already have one, you can skip this step obviously.
Step 2: Go to drive.google.com
Google Drive is located at this link: drive.google.com. Its easy to remember.
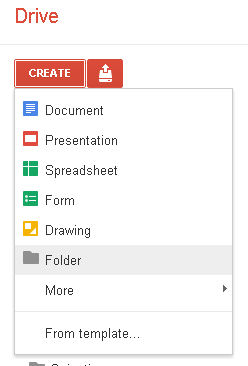
Step 3: Create a Folder
Create a folder by clicking on the “Create” button located on the left of your screen. Then select, “Folder”.
Step 4: Name your folder
We are going to get a little bit organized so name your folder whatever it is you want to share. Maybe “tutorials” or something.
Step 5: Upload or create presentation file
After creating the folder, you can start creating a presentation file from scratch by clicking on the “Create” button. If you are creating one, go to step 9.
Step 6: Select your presentation file (Upload)
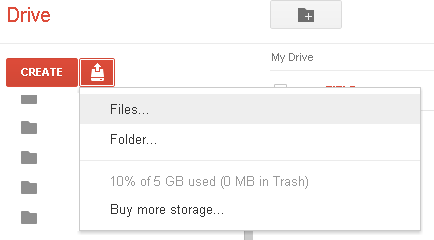
Find your file to upload. Google accepts and is compatible with most presentation file formats like ppt, pptx, .doc, .docx, etc. After you select one or many, click “Open”.
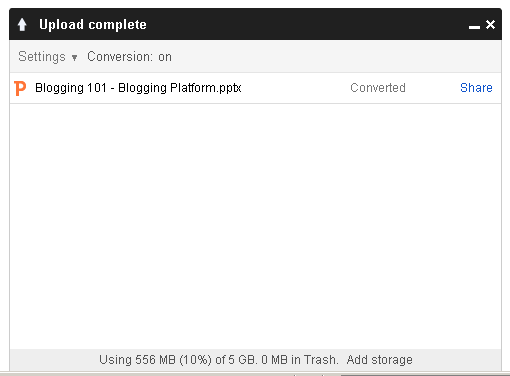
Step 7: Waiting to finish uploading
This might take sometime depending on your Internet connection. Just before this, there are options you can check to convert pdf to documents or convert files to Google compatibility for further editing.
Step 8: Set the file sharing to public
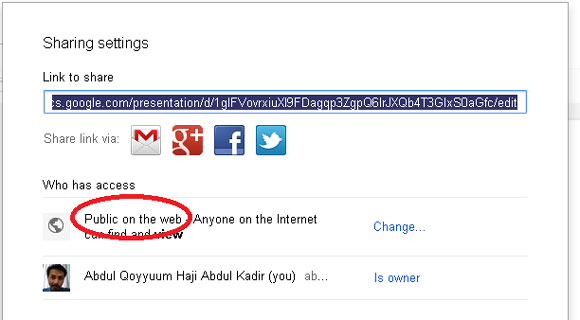
After uploading the file, click the “Share” button, then click “Change” and change it to “Public on the web“. Click “Done“. Here you can also add owners or editors to this file, so there’s your little collaboration feature. Along with some nifty social sharing buttons at your leisure.
Step 9: Publish to the Web
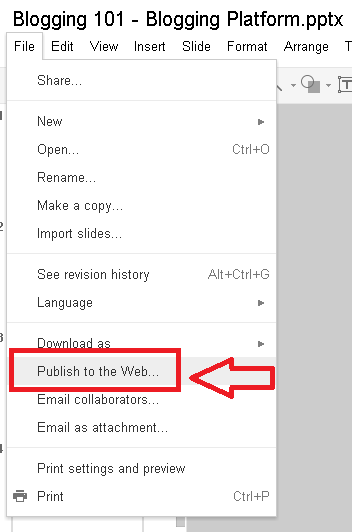
To embed this on your website or blog, open the presentation file and go to “File” then “Publish to the web“.
Step 10: Start Publishing
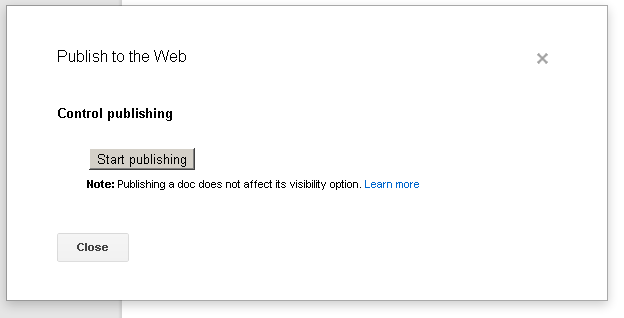
Click “Start publishing”. If you want to know more about its visibility options, click here.
Step 11: Copy the Embed Code
You can change a few settings below the embed code before you copy. Like how fast do you want the presentation to show? Do you want it to start automatically? Do you want to restart the presentation when it reaches the end? I find this a great way to present a product on a splash page or a landing page.
Step 12: Paste and Post
Paste the code in the HTML view of the article and post. It is quite simple as that. No hassle, no fuss. Unfortunately I cannot do a preview of the presentation in this article, so I posted this same tutorial but in a presentation format on my blog site here.


