You never know when your hard drive will die. And it would be a disaster if you didn’t have a backup. All your important data like family photos, videos or business documents could disappear forever. Sometimes, the value of your data is much more expensive than your Mac.
I lost my data once, so I know exactly how difficult and costly it is to recover your MacBook without backups. A Google’s study showed that your hard drive have the chance of over 30% to fail in 5 years of usage. Some other people lost data when making upgrade for Mac OS. Therefore, you absolutely don’t want to save your files only on your computer. This tutorial will show you a simple solution to backup your MacBook using the built-in tool named Time Machine.
Time Machine is a free tool available on Mac OS X 10.5 or later. It can automatically backup your data to another hard drive and you can restore it anytime if your MacBook crashes. Let’s check out the guide.
1. Open Time Machine on your Menu bar. If it is not there, you can find it in System Preferences.
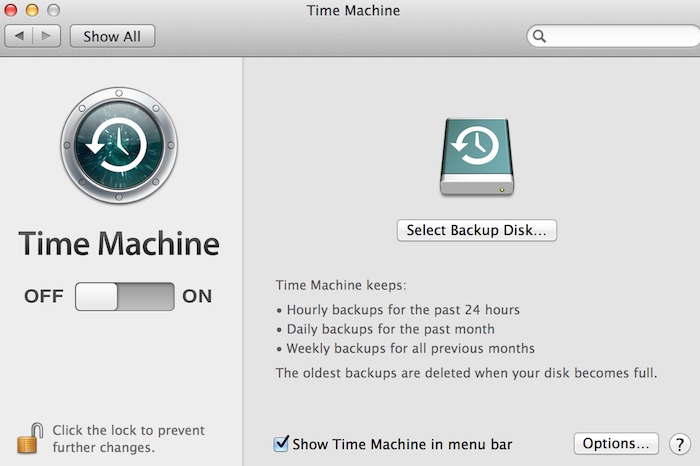
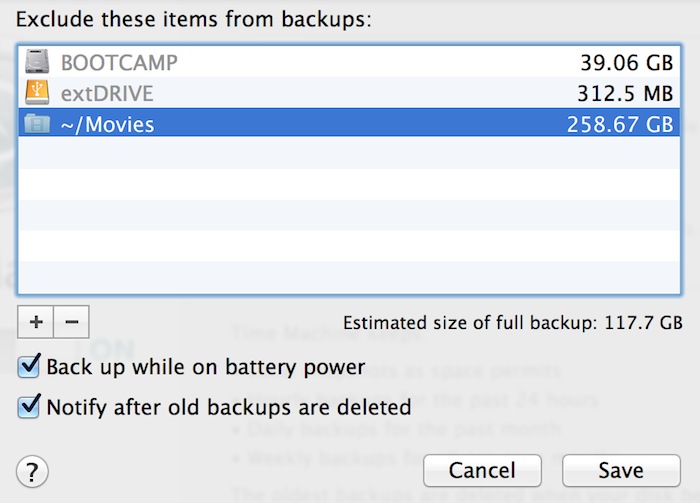
2. You don’t need to backup all files on your MacBook. On the main screen, click on options and you will be able to exclude files and folders. I don’t want to backup my heavy Movies folder, so I exclude it from my backup.
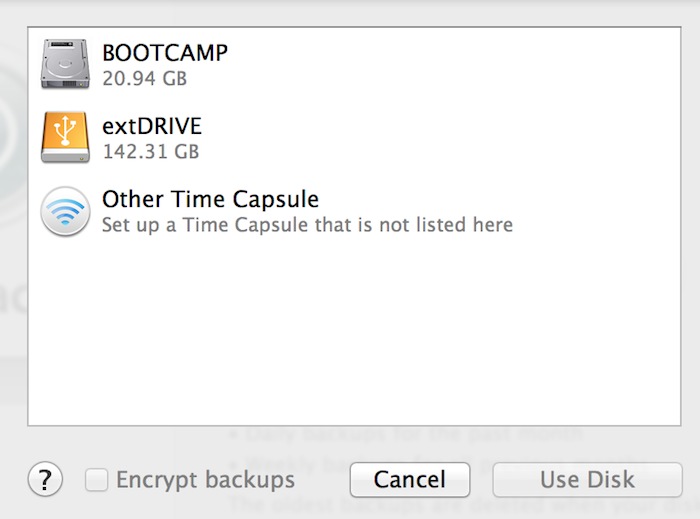
3. Select your Backup Disk and turn on the Time Machine. You will have the options to use an external drive or Time Capsule as backup disk. Time Capsule is a better solution but it is also more expensive. I am using an external hard drive in this tutorial. You can check on the option “Encrypt Backups” to protect it with FileVault 2, another layer of password. It will take a little more time if you select the option.
The tool could prompt a message to confirm that you want to erase your backup disk because it probably has incompatible file system. Make sure there are no important files on the hard drive and click on Erase.
4. The backup process is starting now. It will take a few hours but you still can use your MacBook without any interruption.

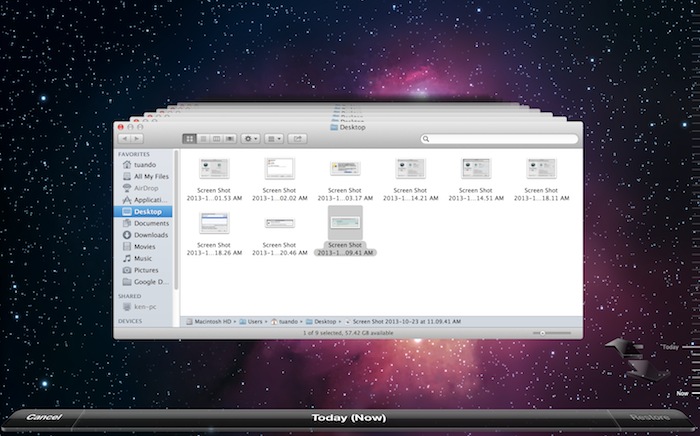
5. To restore your data, click on the Time Machine icon and choose Enter Time Machine. You will see a screen with a timeline on the right showing all saved backups. Select your desired state, choose files and folders you want to recover and click on Restore button on the corner.
Do you have any problem or another way to backup your MacBook? Share with us in comment below.
Disclosure: We might earn commission from qualifying purchases. The commission help keep the rest of my content free, so thank you!
