Today we’re diving into a teardown of the CE-LINK 3,000W portable power station. We’ll explore the intricacies of how it functions from the inside. This powerhouse can charge your devices numerous times and even has the capacity to run larger appliances like a TV, power tools, or cooking appliances for hours, perfect for those times when you’re out camping or in need of off-grid power.
The CE-LINK doesn’t sell to the public or other end users, instead, it is sold in the form of OEM or ODM. I’ve seen some advertisements of the power station in some airports in Asia. Seemingly, the product is promoted heavily in Asian markets. This is so unfortunate for American consumers because I’ve tested the CE-LINK for more than 6 months and really love it.
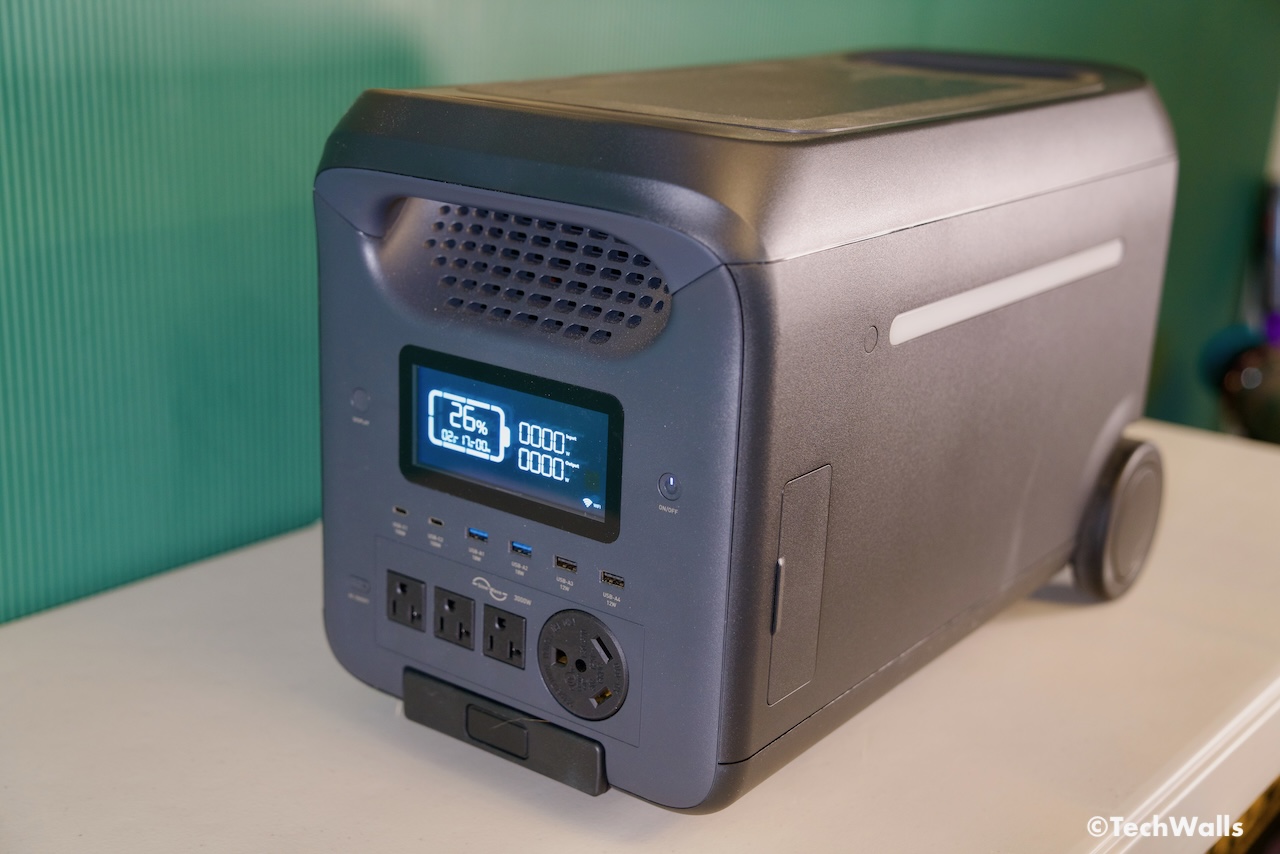
I connect the CE-LINK to my solar panels and the setup always provide enough power for my garage in the summer; I can use my air fryer, recharge batteries for my power tools, and use it during power outage. Its solar input can take up to 800 watts. Besides, I expand the battery capacity with a 2.56kWh battery pack, so the total capacity of my setup is over 5kWh; I can even charge my EV when needed.
Now, let’s get into the teardown.
A word of caution as we start: the CE-LINK 3,000W contains a significant amount of power, making it more dangerous to disassemble than typical electronics like cellphones. This is not a DIY task and attempting to do so will void the warranty. The unit is secured with multiple screws, both at the back and along the sides. As we open it up, we notice that the design smartly integrates plastic clamps in the build, reducing the need for an excessive number of screws. The first screws are found under the top rubber band, which, once removed, allow the top to be removed.
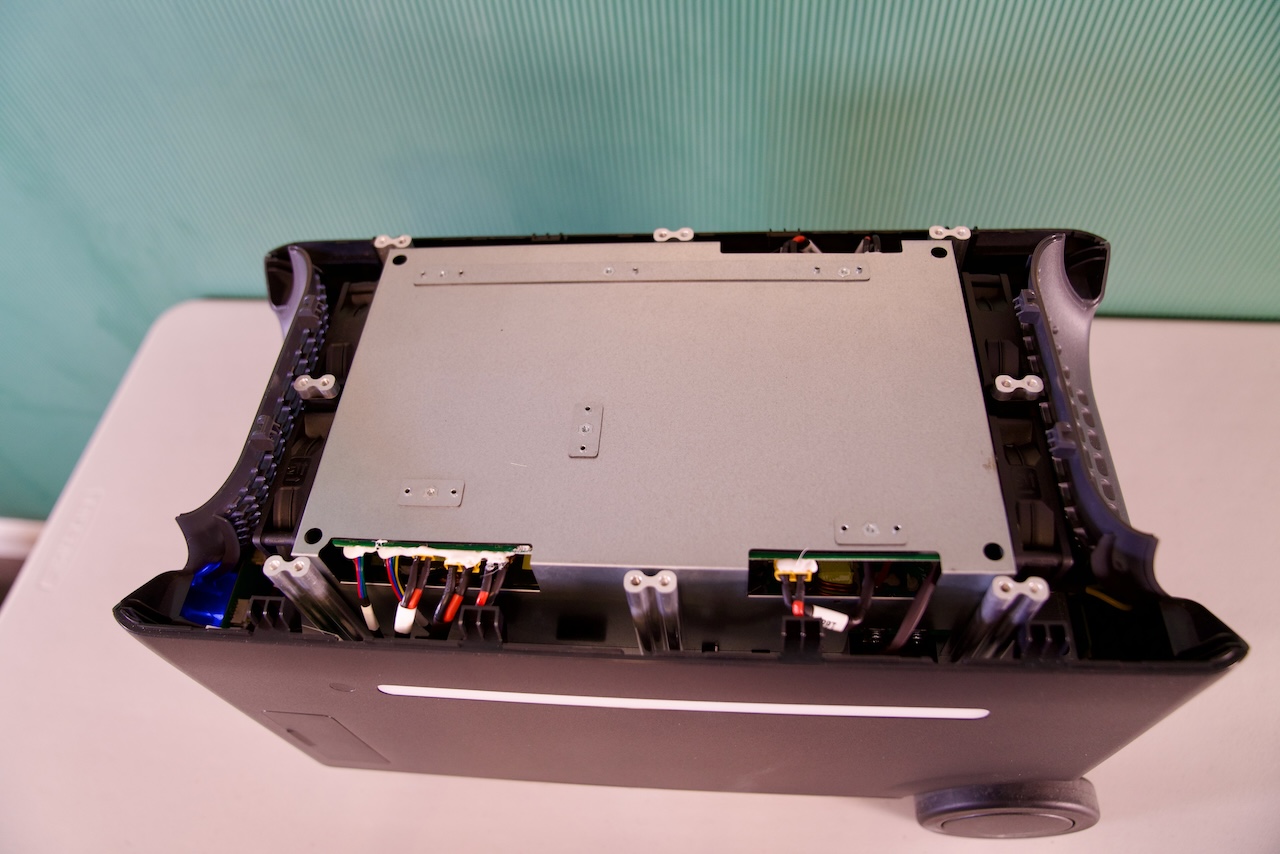
The next step is to disassemble the 2 wheels on the 2 sides. You can pry off the covers and then use an allen wrench to remove the wheels. Now you can find 10 screws on top holding the 2 sides; Use a screwdriver to remove the screws, slightly lift up the side covers to remove them.
Equipped with an Anderson interface, the system is great for 12V RV battery charging. It can be powered efficiently by PV solar energy, making it a sustainable charging option. Additionally, it has the capability to output power to an RV battery, effectively substituting traditional RV solar converters. This dual charging functionality not only allows for flexibility in terms of energy sources but also simplifies the setup for RV users. The integration of solar energy charging supports a reduced dependency on grid power and enhances the system’s portability, making it an ideal choice for outdoor enthusiasts and RV travelers.
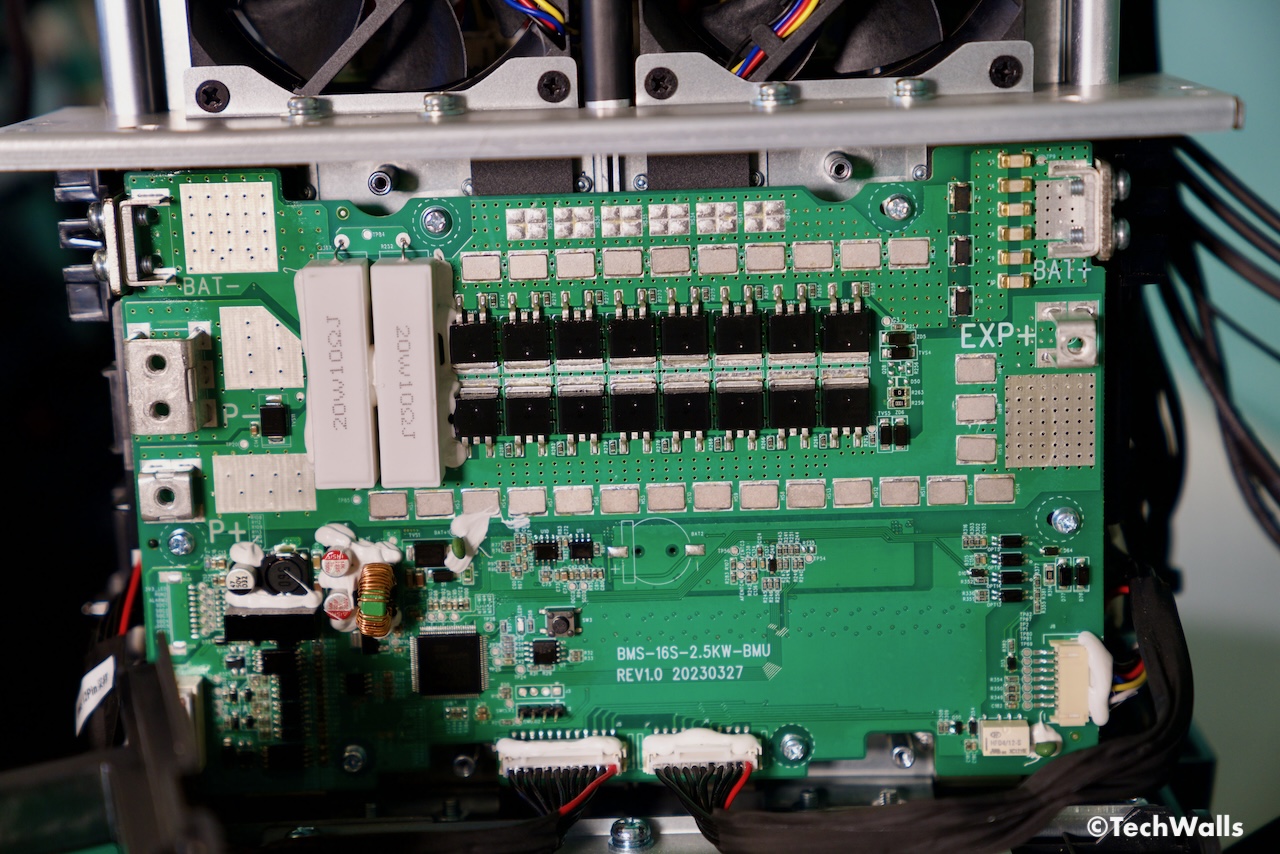
The 2 sides are almost free of components but the remaining parts are packed with interesting hardware. There are 2 fans on the front and 2 fans on the back with air vents on the plastic covers to cool the circuits during power conversion or when multiple devices are being powered simultaneously. After taking off some pieces on the side, I went ahead and disassemble the BMS cover. The BMS monitors battery cells to guarantee the current can charge and discharge safely without damaging the battery.
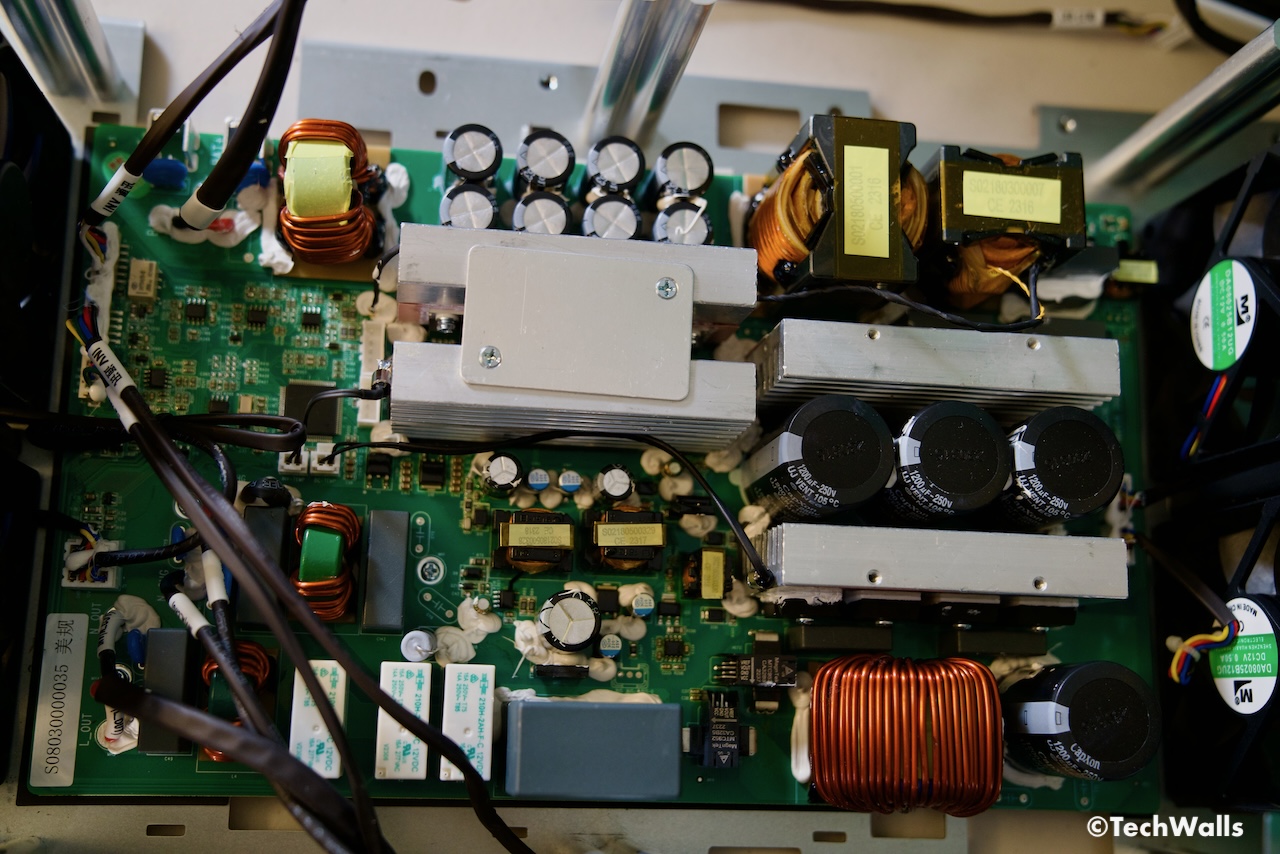
On top of the power station, you can see the MPPT board and inverter board. They stay on top of each other inside the aluminum casing. The MPPT board plays an important role in optimizing the efficiency of solar panels. Its primary function is to intelligently track and find the point at which the solar panel can deliver its maximum power output. This is crucial because solar panel efficiency can be influenced by various factors like temperature and the amount of sunlight, the MPPT board ensures that solar installations operate with maximum efficiency, thereby improving the reliability and performance of solar power systems. On the board, you can see that the resistors, capacitors, integrated circuits, inductors and other components are neatly arranged. They take advantage of available space to make the boards more compact and consequently, decrease the size of the power station. Notably, the manufacturer uses CapXon capacitor here; They are in the 3rd-tier and slightly cheaper than SamXon capacitor found in the EcoFlow Delta Pro power station.
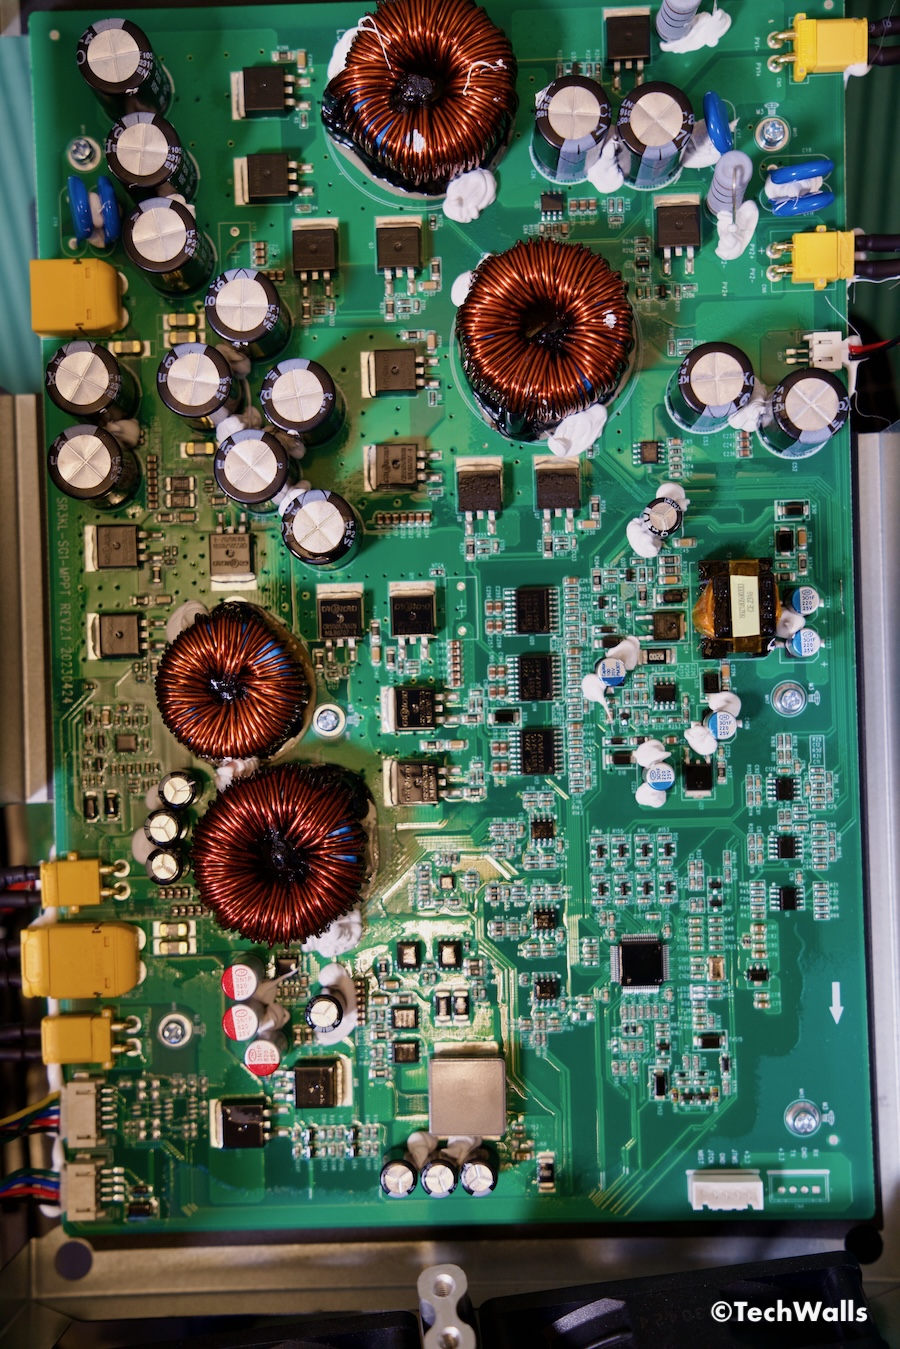
On the other hand, the inverter board converts direct current (DC) – typically generated by solar panels or stored in batteries – into alternating current (AC), the form of electricity commonly used in households and by a wide array of electronic devices. It must handle varying levels of input voltage from the solar panels or batteries and convert this to a consistent and reliable AC output, often mimicking the characteristics of grid power in terms of voltage and frequency. In addition to conversion, the inverter board also includes features such as overload protection, temperature control, and even smart functions for monitoring and optimizing power usage. One thing I notice is that white glue is used all over the place, on the board and on connections. This is very important because the parts could get loose during transit or normal usage. The glue does a great job in keeping all the parts in place.
Besides, the station utilizes bidirectional inverter technology. It includes an integrated power circuit that allows for direct charging from the mains, eliminating the need for external adapters or chargers. The bidirectional capability of the inverter enables a seamless transition between charging from the mains and discharging to appliances. This simultaneous charge-discharge process improves the system’s overall efficiency and user-friendliness, offering a more cohesive energy management solution.
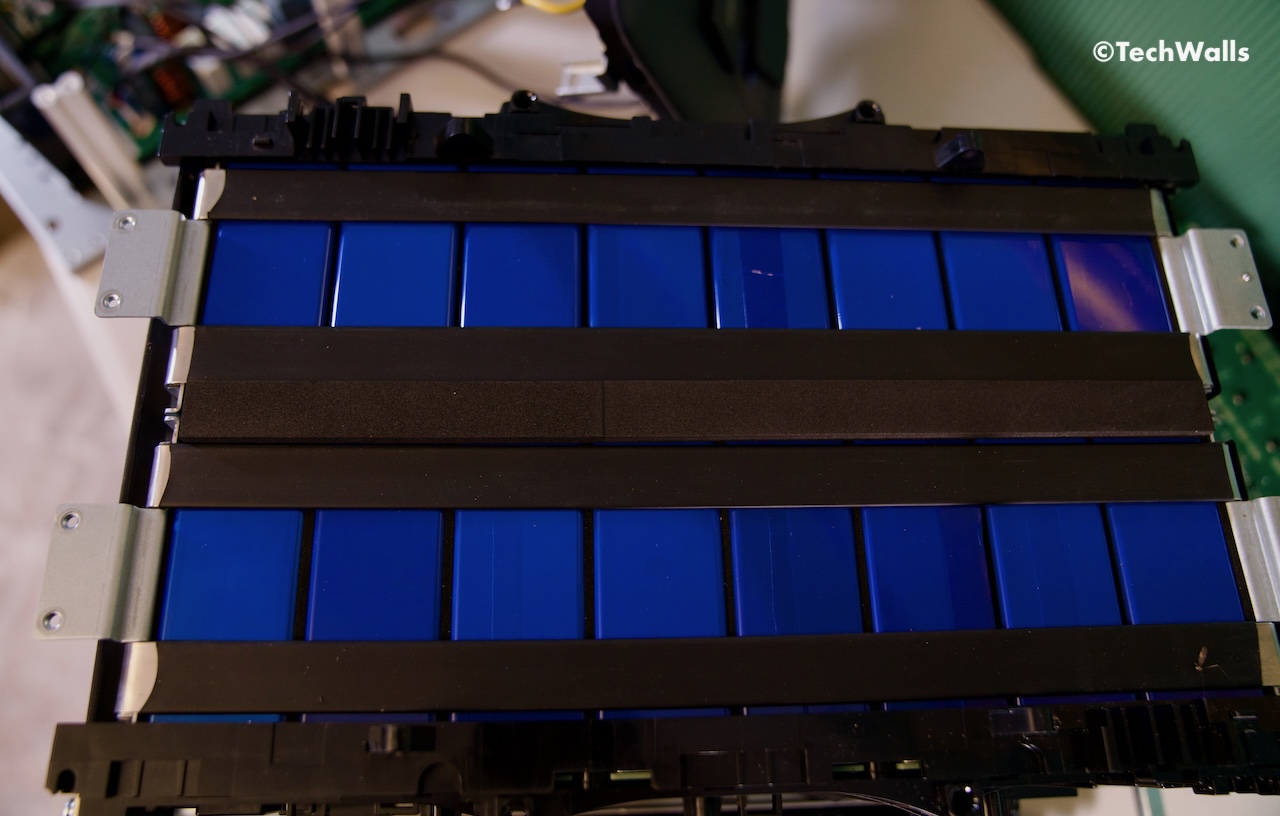
Finally, after removing some more screws, we’ve reached the batteries which are well-protected on all sides. The LiFePO4 battery pack offers a significant capacity of 2,560Wh. Notably, the battery life is longer than industry average, offering up to 4,000 full charge and drain cycles before hitting 80% of original capacity. A smaller power station like the BLUETTI AC200L offers just 3,000 cycles.
Following is the detailed comparison between the CE-LINK 3,000W and BLUETTI AC200:
| Feature | CE-LINK 3,000W | BLUETTI AC200L |
|---|---|---|
| Battery Capacity | 2,560 Wh | 2,048 Wh |
| Management System | MPPT Controller, BMS | MPPT Controller, BMS |
| AC Output Power | 2,400W Max (Surge 4,400W) | 2,400 W (Surge 7,200W) |
| AC Outlets | 3 x 120V/20A Outlets 1 x 120V/25A NEMA TT-30 | 4 x 120V/20A Outlets 1 x 120V/30A NEMA TT-30 |
| USB-A Ports | 2 x 18W USB-A 2 x 12W USB-A | 2 x 18W USB-A |
| USB-C Ports | 2 x 100W USB-C | 2 x 100W USB-C |
| Wireless Charging | No | No |
| AC Input | 1,800W Max, 15A | 2,400W Max |
| Solar Input | 13-45V/12A, 800W Max | 1,200W Max., VOC 12-145VDC, 15A |
| Weight | 75 lbs | 62.4 lbs |
| Dimensions (L x W x H) | 21.1″ x 11.9″ x 13.5″ | 16.5″ x 11″ x 14.4″ |
The battery is designed with a UPS (Uninterruptible Power Supply) functionality, ensuring that power is always available even in the event of a grid failure. This feature is essential for maintaining the continuity of power for critical appliances and devices. Along with UPS, it also includes voltage stabilization and filtering capabilities. These features ensure that the power output is consistent and free from voltage spikes or drops, which can be harmful to sensitive electronic equipment. The voltage stabilization works to smooth out any fluctuations in input power, providing a steady and reliable energy source. The filtering aspect further purifies the electrical output, safeguarding against electrical noise that could interfere with the operation of connected devices.
As you can see, the CE-LINK is a sophisticated product with really good build quality. It is not difficult to disassemble the power station and it probably won’t damage the product if you’re careful. If you need to reassemble the unit, pay attention to ensure all components are properly connected. Stay tuned for more reviews in the future.
