Overhead photography and videography have become so popular as content creators use them for food photography, unboxing videos, and creative arts. However, achieving a stable and secure overhead camera setup can be challenging, particularly when dealing with heavier camera equipment. Here, I share my setup which is easy and affordable without compromising on safety and space.
Previously, I often used my tripod for my unboxing video. I set it at maximum height and shoot down to my desk, however, it always shoot at an angle and never really achieve top-down shoots. Later, I experimented with a setup involving two c-stands, with the camera mounted in the middle using a grip, a spigot, and a tripod ball head. Despite the presumed stability offered by two stands, this setup felt unreliable, especially with the added weight of a heavy camera and lens. The boom arm is stable but I am concerned with the spigot which is held by the grip. If the spigot slips out, my whole camera will be destroyed.
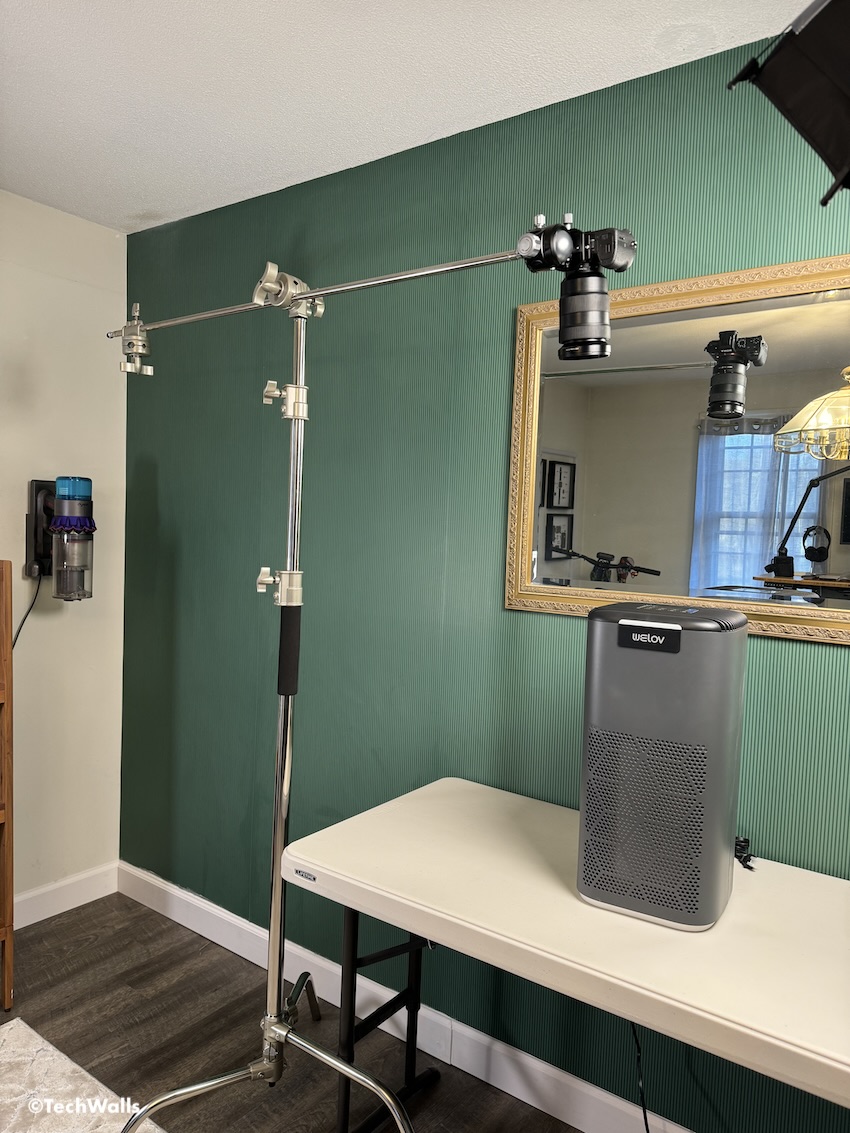
After several adjustments, I finally use a single c-stand for the camera and repurpose the other for lighting. One c-stand could offer great stability and security compared to using two stands. One crucial aspect of this refined setup is the careful positioning of the camera. It should not be extended too far away from the main rod of the c-stand; ideally, it should hover just a few inches past the end of the leg directly underneath. This minimizes the leverage exerted on the stand, reducing the risk of tipping. However, if you need to extend the camera further, you can place a sandbag on the leg. This acts as a counterbalance, offsetting the camera’s weight and ensuring the setup remains grounded.

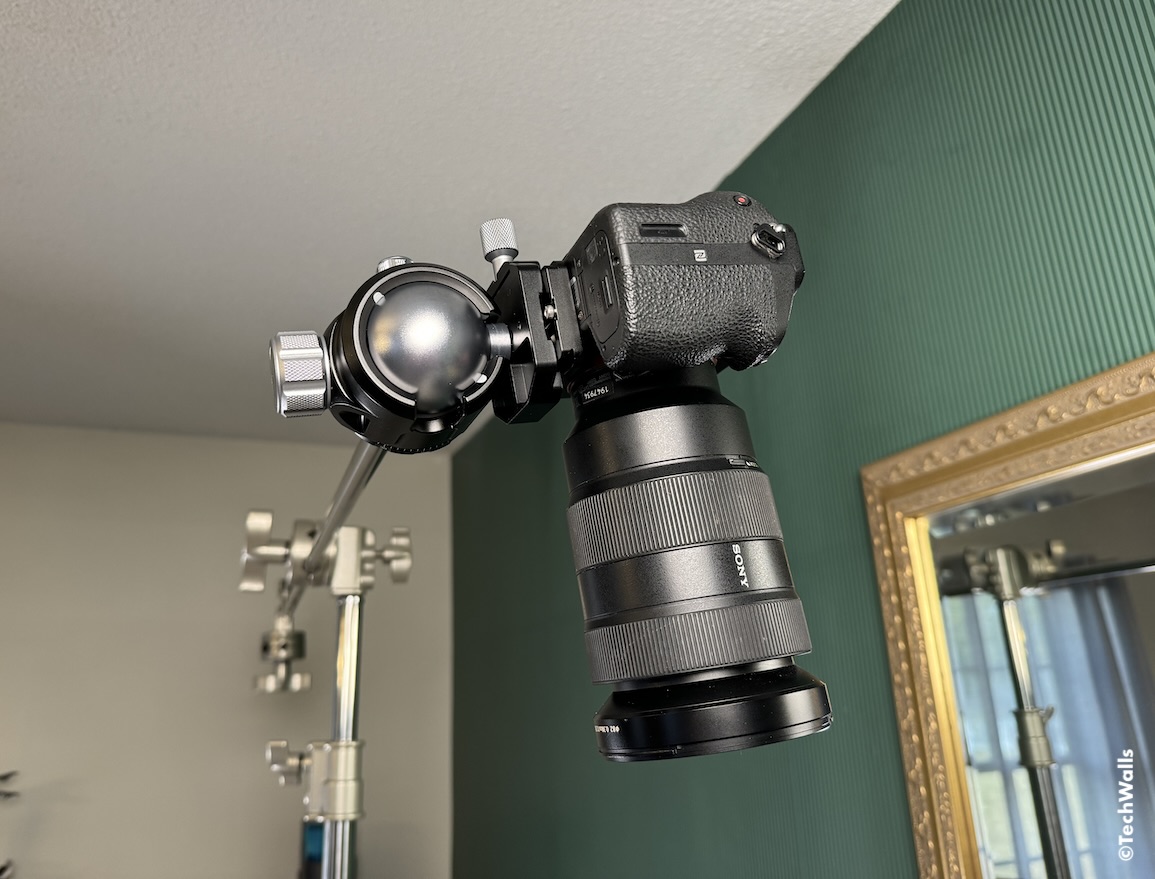
Moreover, adding sufficient counterweight on the opposite side of the boom arm is very important if you have a heavy camera. Another tip that has significantly improved the security of my setup is mounting the camera on the right side of the boom arm. This positioning ensures that the weight of the camera naturally tightens the tripod ball head as it tries to rotate under the load, thereby increasing the grip and reducing the likelihood of slippage or sudden movements.

I have used this setup for a few months; Not only is it secure and stable, but it also offers ease of setup and adjustment. As the tripod ball head comes with a quick-release plate, I can quickly remove the camera and put it on my tripod. Therefore, now I can focus on my work rather than constantly wrestling with equipments.
Beyond the technical setup, it’s essential to regularly check to ensure all components, especially those bearing weight or subject to movement, are in good condition and tightly secured. Regular checks can prevent accidents and equipment damage, saving time and money in the long run.
In conclusion, creating a secure and stable overhead camera setup for top-down shooting is easy and doesn’t have to cost a fortune. The whole setup including a Neewer C-Stand, and a ball head cost me less than $200. You can achieve a reliable setup that meets the demands of professional photography and videography. This allows you to concentrate on capturing the perfect shot and enhance productivity.


