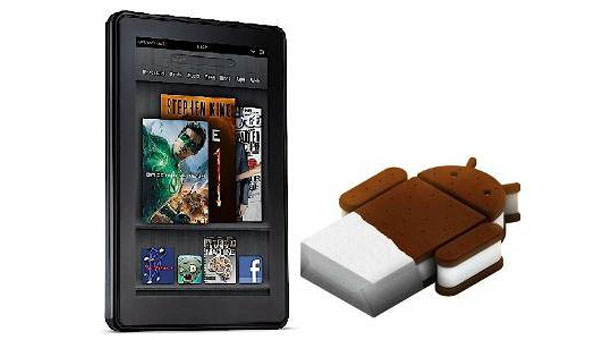
Ever since the release of Kindle Fire, there have been a lot of customization efforts to help Kindle Fire users enhance the functionality of their tablets. In previous posts we showed you how to root Kindle Fire and to install Android Market and Google apps. To make things more fun, we will now tell you the procedure to install an Ice Cream Sandwich Launcher and how to switch back to the stock Kindle Launcher.
Launchers have always been a fun way of adding eye candy and making application access more fun in Android devices. There are many third-party developers who provide alternative launchers for Android based devices. When installing a new launcher on Kindle Fire, the process may seem simple, but users are likely to get confused when it comes to setting the default launcher or when they might wish to revert back to the stock launcher. The below guide can be used to understand the process for installing new launchers and for setting your default Kindle Fire launcher.
How To Install Ice Cream Sandwich Launcher On Kindle Fire

If you want an Android 4.0 Ice Cream Sandwich launcher for your Kindle Fire device, then all you have to do is to install it from Syndicate apps. If later on you wish to make the stock or any other launcher as your default launcher, then see instructions in the next section of this post.
Instructions: Simply visit “Syndicate Apps” website and install the Ice Cream Sandwich launcher from here.
That’s all you need to do to get the delicious “Ice Cream Sandwich Launcher” for your Kindle Fire tablet. Now that you have installed the Ice Cream Sandwich launcher, you might also wish to make it as your default launcher. To learn now to do that, see instructions below.
How To Change Default Kindle Fire Android Launcher
Step 1: To get started, go to Settings –> More –> Applications.
Step 2: From the filter select the “All Applications” option.
Step 3: Now, find your default launcher, e.g. “Kindle Launcher” and tap on it.
Step 4: From the “Launch by default” option, tap on “Clear defaults”.
Step 5: Tap on the Home button and you will see an option to select a launcher, i.e. if you have more than one launcher installed on your Kindle Fire tablet. From here, check the “Use by default for this action” option and select your preferred launcher to switch to e.g. “Ice Cream Sandwich Launcher”.
Your selected launcher will become your default launcher. With the rapid increase of Kindle Fire users and customization enthusiasm, it is likely that we will see many stylish Kindle Fire launchers in the near future. Having said that, one should also bear in mind that Kindle Fire users should avoid attempting to install all kinds of third-party applications and tweaks which may becomes available, as many of them can also result in damaging your device. We at TechWalls will keep you posted with the latest Kindle developments and provide you with more guides of reliable procedures and applications that can enhance the functionality of your Kindle Fire tablet.
Disclosure: We might earn commission from qualifying purchases. The commission help keep the rest of my content free, so thank you!


TumuTanzi says
It is a pity Kindle Fire has still not open for the market outside of US.
Cameron says
Doesn’t work with Kindle Fire. “the ics 4.0 application launcher (process android.process.acore) has stopped unexpectedly”.
Guest user says
If you just set action on home button press just put it as open app and select “launcher name”
Tech Blogging says
But, i have a question that can we install any version of Android on it. Actually i want to know about Jelly Bean.
Pete says
I have installed ICS v2.4 and I can’t clear the Kindle Launcher as default because the option is grayed out. It’s grayed out on both launchers.
Josh says
My option is frayed out too
:(
Andrew says
My option is grayed out too. PLEASE HELP
D Miller says
I don’t see kindle launcher anywhere……
anonymous - says
now it says Launcher and it is grayed out for me too