iPhoto, especially it’s summer update last year, has become a great update for the photo application in terms of features and organization. It is so good that I find myself using it all the time when importing photos before sending them off to Photoshop or Adobe Illustrator to get some perking up. Users of all difficulty levels find the software to hold great for organization, however, it can be hard to keep this up for most of us. From importing during busy hours in our day to the supposed time consuming task of actually organizing the photos, it is something that many photographers forget to do. However, organizing photos isn’t hard or time consuming. Today, we will look at a couple of tips on effective iPhoto organization.
Events vs. Albums
One organizational confusion many iPhoto users have is the difference between events and albums. When importing photos from your camera to iPhoto, photos can automatically be placed into an event if they are all imported at one time. You can be prompted to name this event, or else iPhoto will name it for you based on the date of importation or when the photos were taken. Albums are different. They are found on the left side of the iPhoto application. Multiple events can be in an album, but multiple albums can’t be in an event. Albums are mainly collections you create yourself that can be of different events or the same, it isn’t connected to events in any particular way. Both are great ways to organize your photos. You can merge two events by dragging and dropping onto each other. You can create events by going to “Photos”, clicking and highlighting all of the photos you want to include, click “Events” in menu bar, and click “Create Event“. To create an album, highlight the images, then click Command + N.
Faces and Places

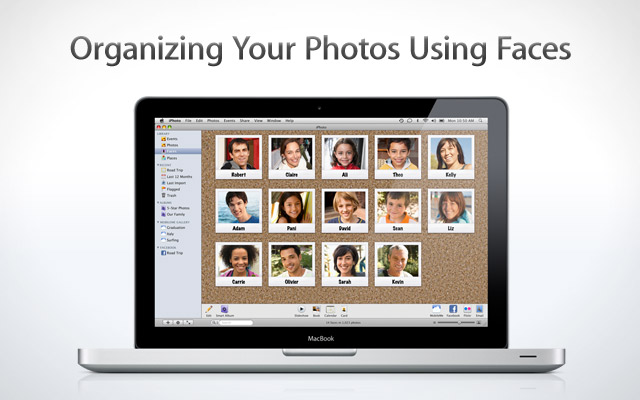
iPhoto has a feature that allows you to match faces with names. This is done manually, to prevent any misnaming. However, the software will detect if a face is seen in the photo. To manually name the detected face, as well as to detect more faces, all you have to do is click on the photo, click info at the bottom right corner. Then, detected faces will pop up. Click on each one to edit the name. To add a detected face, click “Add a Face“. You also have the ability to add location to photos. This is a great way of keeping a good sort of your vacation photos for example. To assign a location, click on info after clicking the photo. Then, where you see the map titled ” Assign a Place…”, click on the arrow next to it. Then, click on where it was taken or search for it.
Stream in Your Photos
With the iCloud implementation on iOS devices, iPhoto received an update itself in OS X Lion with the ability to “Photo Stream” your photos to your iOS device. Photo Stream works with iCloud allowing you to view your most recent (past 30 days) photos in your iPhoto library. To activate, simply go to the tab named Photo Stream and then click the blue “Turn on Photo Stream” button.
Keywording Your Photos
When searching online, you use keywords to find an article that you specifically are looking for or at least one relating to a subject. iPhoto has a keyword feature that words the same for photos. When going to the photo, then the info section, you can add keywords to photos for easier retrieval. You can add as little or as many as needed, this is highly recommended for great photo record keeping. If there are certain keywords you find yourself using a lot, like “vacation” for example, you can add it to quick keywords for faster referral. To do this, just click Command + K.
Photos Are Never 100% Safe
While the threat is low, many individuals feel that once photos go into the iPhoto album, then this will act as a drive for their precious memories. You have to remember if something goes wrong with your Mac, the best case is that only the photos taken within the last 30 days will be saved. Worst case scenario is none of your photos will be saved. This is why they should be saved in another area. Preferably, you have routinely save photos on a back up external hard drive. However, not everyone can afford purchasing one. If that’s the case for use, then save them in the cloud. Cloud storage is mainly saving your photos for retrieval on websites that allow you to save documents and multimedia, like a virtual hard drive. One recommendation is Dropbox. You get 2GB free, and when you recommend others, you get more storage.
Disclosure: We might earn commission from qualifying purchases. The commission help keep the rest of my content free, so thank you!


Glenn Mccrosky says
Thanks for sharing your story, Karina. I didn’t have any problems when I canceled my JungleDisk account, but I should note that I still use Amazon S3 and so I didn’t cancel my S3 account.
Clara Scherler says
I have a Desktop, a ThinkPad and a Motorola Photon Android phone. I also have two external hds I’m using for additional storage. Right now I am using Carbonite on the two computers and have a fair amount of data being backed up. The subscription is about to run out so I am thinking about another service. Basically I would like to backup/store my data on all three. At the same time I would like to do some syncing of the machines to the phone. I’m paying Carbonite $59 yr for each machine so I don’t mind doing the same for another service.