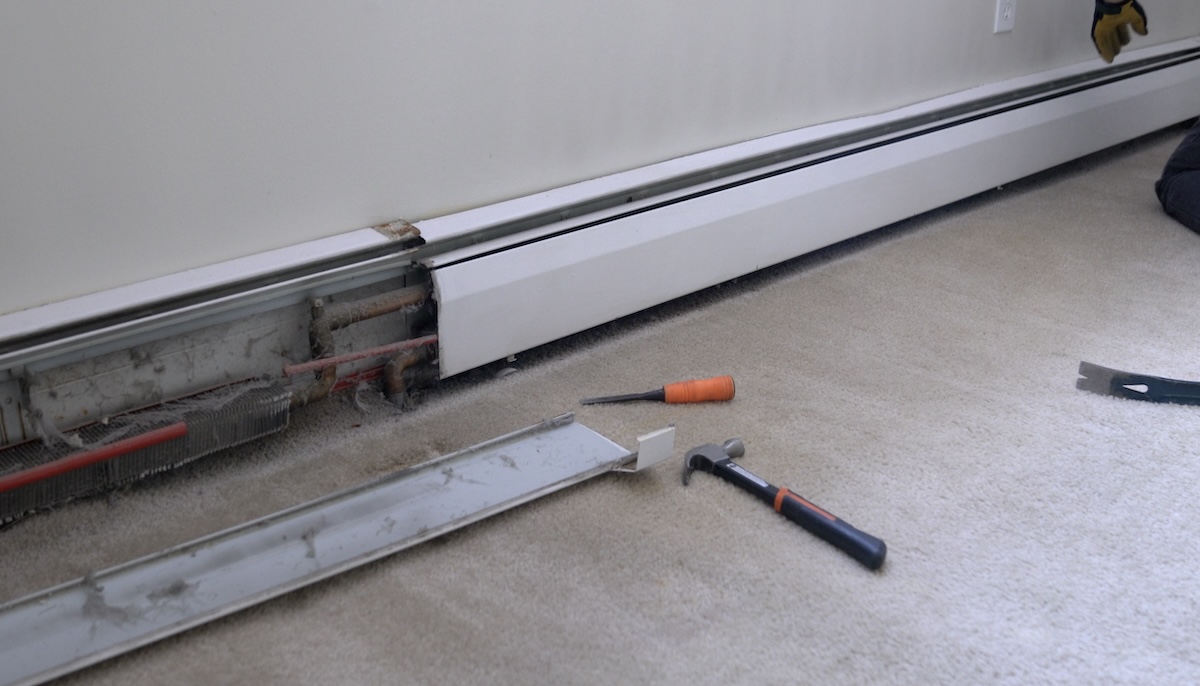
After transitioning to a heat pump, my next step was removing the oil boiler and draining water from the system. With the heating system obsolete, it’s time to remove the old baseboard heaters that no longer serve any purpose. These baseboard units not only take up space but also act as dust collectors.
Step 1: Prepare the Workspace
Before starting, ensure the space is clear and protected:
- Turn off all power: If any electrical wiring connects to the baseboards, ensure the circuit breaker is turned off to avoid electrical hazards.
- Protect the floors: Lay down a drop cloth or tarp to prevent damage to your flooring and to catch any debris during the removal process.
Step 2: Locate Water and Pipe Connections
Since you’ve already drained the water from your system, the next step is to check for pipe connections:
- Examine where the pipes enter the baseboard: In most hydronic systems, hot water pipes run from the boiler through the baseboard units and back. These pipes are usually copper or sometimes iron.
- Trace the pipes to ensure the system is fully drained: Even after draining from the boiler, there may be residual water in the pipes. If you suspect there is still water, open any nearby bleed valves to release pressure.
Step 3: Disconnect Pipes
To fully remove the baseboards, the pipes connecting the units need to be disconnected or cut:
- Cut the pipes: Using a pipe cutter or a reciprocating saw, carefully cut the supply and return pipes where they connect to the baseboard unit. If there’s any lingering water, have a bucket or towels ready.
- Cap the pipes: After cutting the pipes, use pipe caps to seal the open ends. This step is crucial to prevent any potential leaks or air circulation issues through the old pipe system.
Step 4: Remove the Covers and Baseboard

Once the pipes are cut, you can move on to removing the baseboard units themselves:
- Pry off the cover: The baseboard heater covers are typically clipped on. Use a flathead screwdriver to pop the cover off. You may need to use a pry bar if it’s stuck or difficult to remove.
- Unscrew the baseboard unit from the wall: Look for screws or nails securing the unit to the wall. Depending on the type of fastener used, use either a screwdriver or a pry bar to loosen and remove them.
- Detach the baseboard unit: Once the screws are removed, carefully lift the baseboard away from the wall. You may need to gently tug it free if it’s stuck due to paint or other adhesives.
Step 5: Patch and Repair the Wall
With the baseboards removed, your wall may have gaps, holes, or other imperfections where the unit was attached:
- Patch the holes: Use spackle or joint compound to fill any screw holes left behind. Once dry, sand the area smooth.
- Repair larger gaps: If there were significant gaps left by the piping or brackets, you may need to use larger patches or drywall compound to smooth out the area.
- Paint and finish: After patching and sanding, repaint the wall to match your room’s color for a seamless finish.
Final Thoughts
Removing hydronic heating baseboards can significantly improve the look and feel of a room, especially after upgrading to a more efficient system like a heat pump. By removing these old baseboard units, you’re not only clearing up an eyesore but also taking the final step in fully transitioning from an old heating system to a more modern and efficient one.


