It’s been while that Samsung released their next generation Phablet i.e. Galaxy Note 3. It has everything which a successor needs to have. Many of you might be enjoying its beastly power because device is powered by Snapdragon 800 CPU which is the fastest processor on Earth at present backed up by 3 GB of insane RAM which helps to do mutli-tasking seamlessly. It’s not all; new S Pen is worth to give a shot. You can do some great things with that.
But there is another community of users who can’t use any device in their default state those are called Tech Freaks or Geeks and for all those rooting, flashing or jail breaking is a habit. But this time Samsung did something which made rooting of Galaxy Note 3 difficult. Company included their Knox Security software which gives a scar on processor if one tries to root or flash device. This will void the warranty of your device so all risk in on you. If you still want to root what are you waiting for? Go ahead and follow the guide below to root your mighty Note 3.
Worth to Read: Samsung Galaxy Note 3 and smart watch specs
This guide is for all those Note 3’s which have unlocked boot loader.
Step #1
First of all you need to download CWM recovery for your concerned version. So go to this link and download recovery for your model only. Be very careful while doing this otherwise you might brick your device.
Download Odin from here and SuperSu from here and then extract Odin Zip in one folder as usually we do.
You need to have required drivers for your device. If you have Kies installed then it great otherwise you can download drivers from here.
STEP #2
Now connect your device to your system and transfer Supersu file which you downloaded earlier to SD card of your device.
STEP #3
Now you need to take your Note 3 into download mode for that you will have to use button combination. First switch off your device then hold Volume Down and Power Button simultaneously, then you will see Warning screen. Click on Volume Up button if you want to continue rooting your Note 3 otherwise tap on Volume down, it will cancel and restart your device.
STEP #4
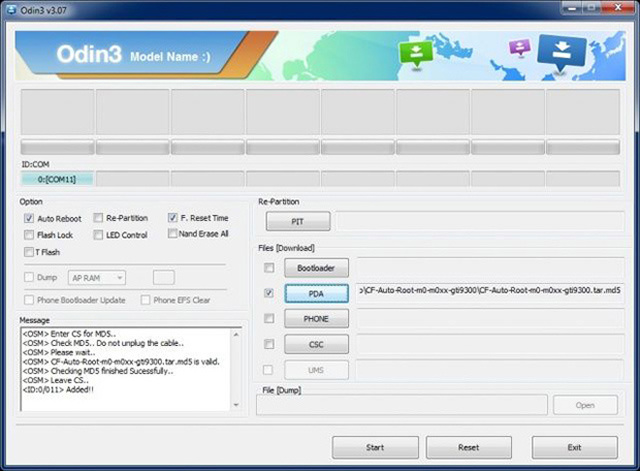
Now head over to computer and Run Odin, make sure that Kies is not running behind at this time and Anti-virus is also disabled.
STEP #5

Now connect your device with your system via USB cable. As Odin recognizes your device first box will turn blue. Then click on PDA and select the CWM recovery which you downloaded earlier.
STEP #6
Click on Start and wait for flashing to complete. If process completes then your device will restart automatically.
STEP #7

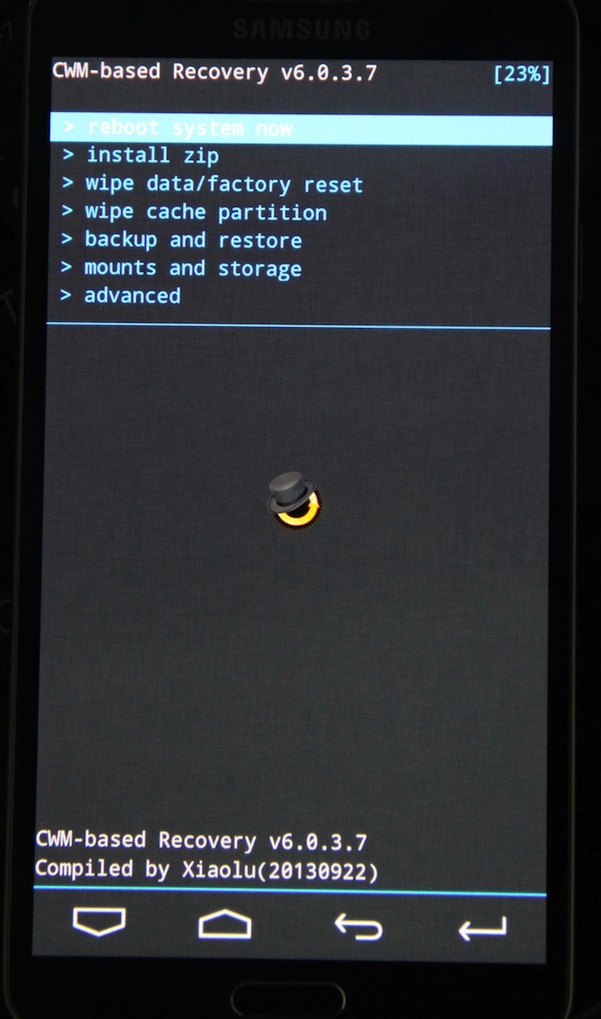
Now you need to take your Note 3 into recovery which you can do by using button combination: Volume up and power button. Now in recovery menu choose Install Zip from SD card option. Select the Supersu file which you transferred to your device earlier. After installation reboot your device by selecting that option.
And you device is rooted successfully. Keep one thing in mind that now you can’t perform OTA updates because it will unroot your device. Which apps you install first after rooting your device do tell us in comments below.
Note: All the above processes can permanently brick your device so be aware of that. Also we don’t have any responsibility if your device gets harmed in any way. It is totally up to you that whether you want to root and flash a custom ROM on your device or not.
Disclosure: We might earn commission from qualifying purchases. The commission help keep the rest of my content free, so thank you!


