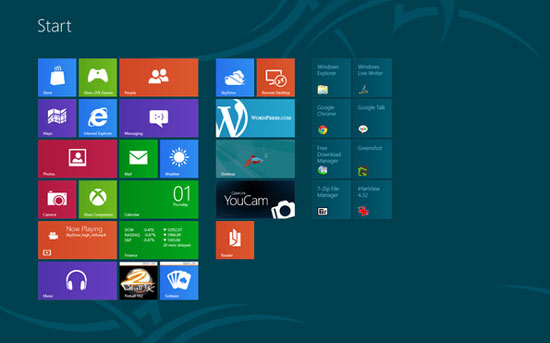
Whenever you install any application, you will notice that these applications appear in tile forms on your Windows 8 start screen. There are 2 kinds of such tiles: Metro tiles and the non-Metro tiles. The Metro tiles are the more animated, colorful and rectangular in shape. They may show the icon or display live information. The non-Metro tiles are the normal, square shaped smaller icons. In the image shown below, the Metro tiles are to the left and the non-Metro tiles appear in a group of 8 on the right.
Selecting Tiles
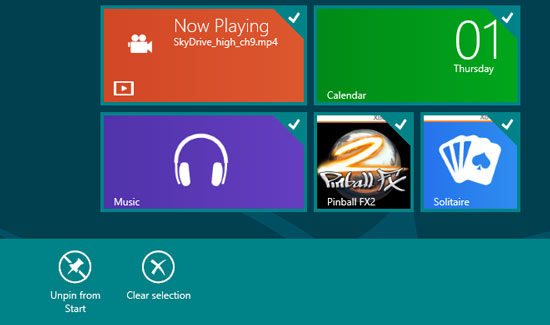
If you want to customize the tiles or any particular tile, then simply right-click on the tile. A pop up appears with a number of options on it. You can select the action you want to perform. If you want to select multiple tiles together at the same time, then you keep on right clicking on them. This time different options will be available at the bottom of the screen. To de-select any tile, right click on it again.
Available Actions
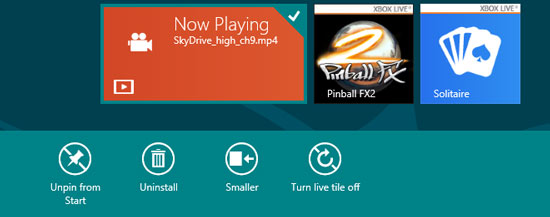
Once you have right clicked on any single tile, a number of options appear at the bottom of the screen. The type of options depends on the particular application which you have selected. The Metro tiles generally have the following options: ‘Unpin from Start’, ‘Uninstall’, ‘Smaller/Larger’, ‘Turn Live title on/off’.
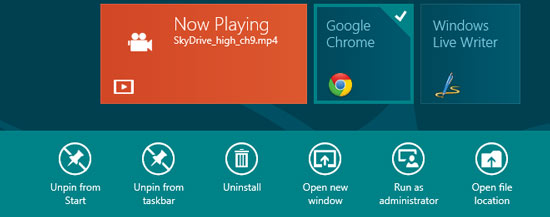
For non-Metro tiles, the options differ.
Unpinning (Deleting) Tiles
Sometimes it really gets crowded on your start screen. You install any application and its tile form appears on the Start screen. This can really get irritating. With the help of the Unpin from Start option you can simply remove the tiles you do not want on your start screen. This will not uninstall the application and you can pin them back as and when you want. This option appears on right-clicking on the tile/tiles.
Pinning Tiles
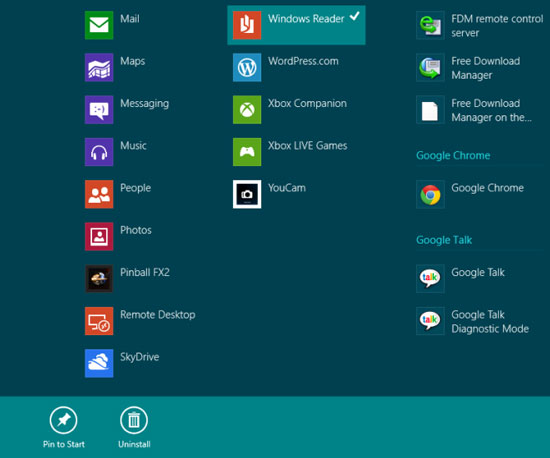
- Right click on the background of the Start screen and not on any of the tiles.
- At the bottom, an option named ‘All apps’ appears.
- Click on it. You will get a list of the available applications.
- Select any one of them and you will get the option to pin them on your front screen.
- This way you can maintain all your important tiles on the start screen for easy access.
Resizing Tiles
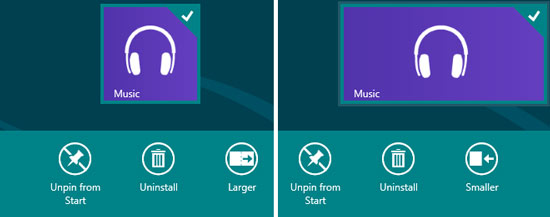
When you select any particular tile, you are given the option to set its size. You can increase its size by a predefined ration or decrease its size. When you right click on any tile, the option of Smaller/Larger appears on the bottom of the screen. By clicking on this option, you can resize the tile as per your convenience and preference.
Organizing Tiles in groups
Organizing your space, gives it a good feel and look. It also makes it easier for you to search and locate your things. In this case, you are able to organize the tiles on your start screen. You can group similar application tiles together. This will help you in accessing the desired application quicker. If you have a number of tiles lined up on your start screen, then a disorganized tile arrangement is going to make it worse for you. You can simply drag these tiles along the grid and drop them. They will realign themselves on the pre-defined grid alignment.
You can even drag them in different columns. If you drag any tile horizontally, you will notice a gray bar appear on screen. Drop the tile in this grey bar. Now your tile has an entire column in itself. You can place other tiles in that column to group them.
Disclosure: We might earn commission from qualifying purchases. The commission help keep the rest of my content free, so thank you!
