If you are hosting your website on DigitalOcean, there will come a time when the server can’t accommodate your website’s growth anymore. That’s when you will have to consider upgrading your server, which means resizing your droplet to have more RAM, disk space and bandwidth.
Or in my case, I just set up a DigitalOcean droplet last week but as my server keeps getting errors like system running out of memory, therefore, I have to resize my droplet immediately to avoid regular downtime on my WordPress sites.
You can find some guides on their website, but it doesn’t include details on how to create a new droplet with the same IP address you’ve used so far. You can use the Fast-Resize functionality on DigitalOcean’s dashboard, however, it will increase the RAM only and you will not receive more disk space and transfer. This is kind of wasting because you have to pay the same amount of money. Now, let’s check out the proper way to upgrade your droplet, you will just need to follow the exact steps below.
1. Power off your server:
Your droplet is required to be turned off before we can make a back up. Go to Putty/Terminal, SSH to your server, and then type the command:
sudo poweroff
Your server will be off immediately and you can continue with the next step now.
2. Back up your droplet:
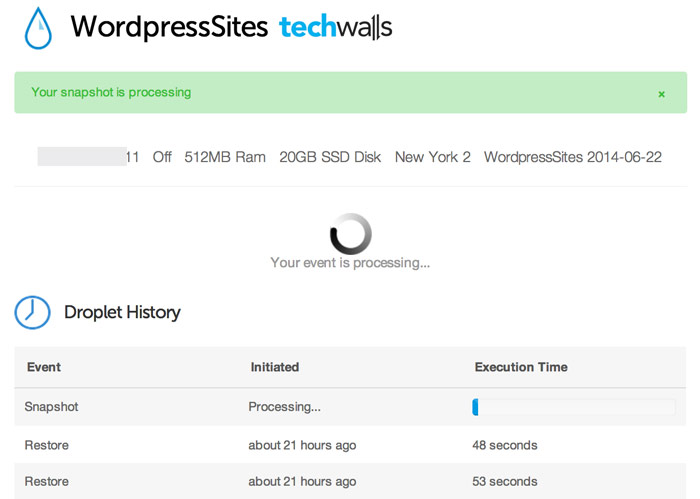
The step is to back up everything on your server. Fortunately, it is made quite easy, you will just need to go to DigitalOcean’s Control Panel -> Droplets, choose your droplet, then the tab Snapshots -> Take a snapshot. The process will take some time depending on the amount of data you have on your server. In my case, I was using over 2.4GB of disk space and it takes just 4 minutes to take a snapshot of the droplet.

3. Destroy your droplet
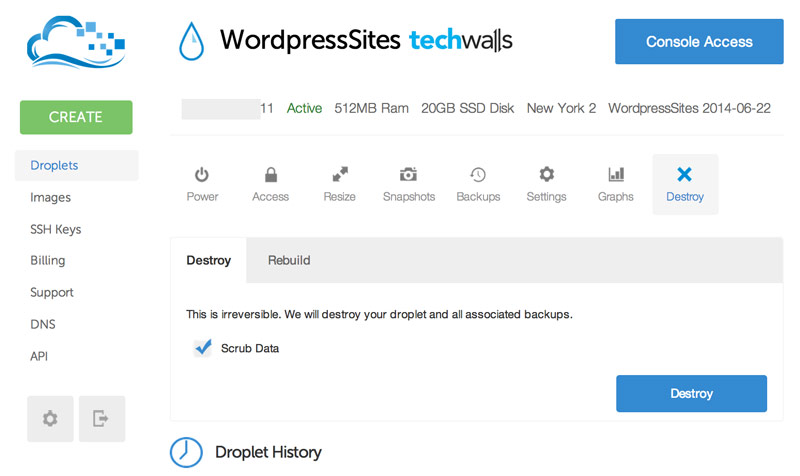
The next step is destroying your current droplet. This is to make sure you will be able to keep your IP address. Before deleting the droplet, make sure to write down the droplet’s name and datacenter. Some datacenters could be not available when you try to create a new droplet later, so you might want to try clicking on Create a new droplet to check if it is still there. For example, my server is running on New York 2 region, so I can try going to the page of creating a new droplet to see if it is still being offered.
After those checks, click on the Destroy button in the Destroy tab.

4. Create your new droplet
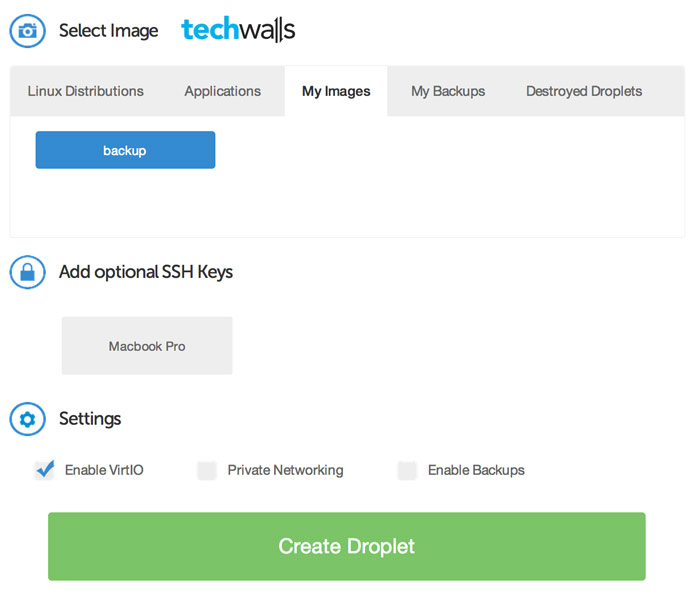
Click on the Create button to go to the page of creating a new droplet. You will have to use the same droplet hostname and region. Under the Select Image section, choose the tab “My Images” and choose the snapshot you’ve just created. Then click on the Create Droplet button, the process took me over 16 minutes. After that, my websites are up again on the same IP address, there is no further configuration required.

5. Remote host identification has changed
You will probably not be able to SSH to your server and see the following warning:
REMOTE HOST IDENTIFICATION HAS CHANGED!
IT IS POSSIBLE THAT SOMEONE IS DOING SOMETHING NASTY!
Don’t worry, just use the following command from your local machine:
ssh-keygen -R your_server_IP_address
All done. You have successfully upgraded your droplet and keep your websites running. Drop a comment below if you have any problem.


ucheng says
nice article!
Laurence says
Awesome, this helped!
Suresh Khanal says
The problem of downgrading is more than uggrading droplet size. That’s why I had to rely on fast resize though it did not let me have more disk space.
following your way how to downgrade to original sized droplet after you increase?