You are probably aware that both Google and Microsoft ended the support to create free custom domain email and use their services to manage email addresses. This is bad news for webmasters and startups because sometimes we just need to create a custom email for a single user.
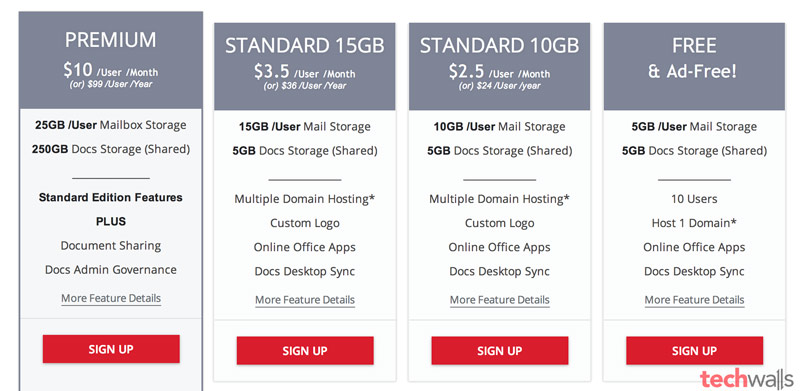
Fortunately, Zoho is one of a few reliable services offering the service for free. There are some limitations such as 5 GB/user Mail Storage, 5GB Docs shared storage, 10 users and 1 domain hosting, however, it is still more than enough for majority of us. If you are looking for a free solution, I totally recommend the Zoho service. You can follow the simple steps below to set up your custom email.
1. Sign up
You can sign up for a Zoho Mail account here. They are offering 4 different packages, I’d recommend you to try with the free option first and upgrade it later to paid packages or to Google Apps or Outlook when your business needs to expand.
2. Set up your Domain Email
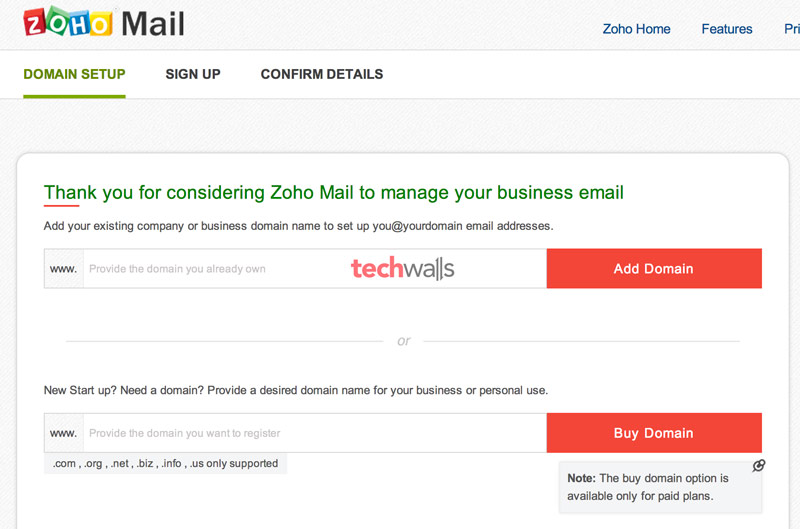
Go ahead and set up your domain in this step. You just can add your existing domain because the option to buy a domain is available on paid plans only.
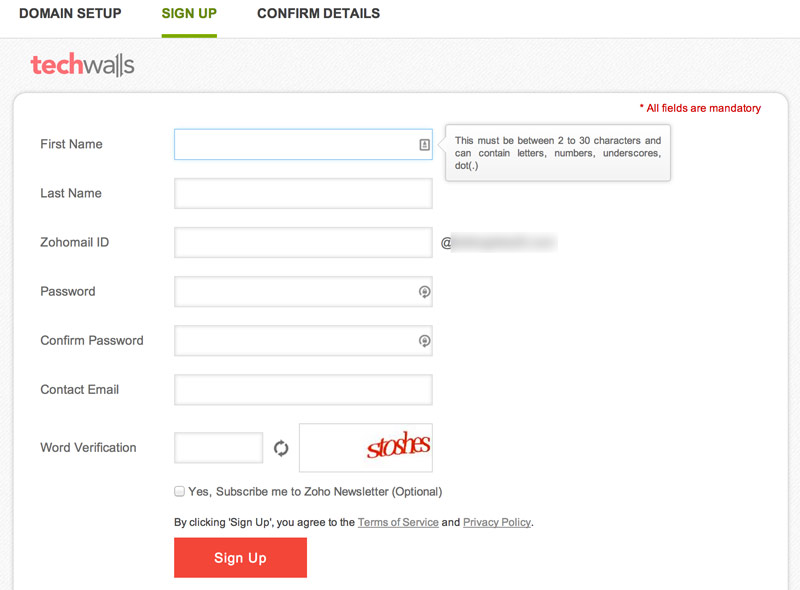
Fill in your account’s information.
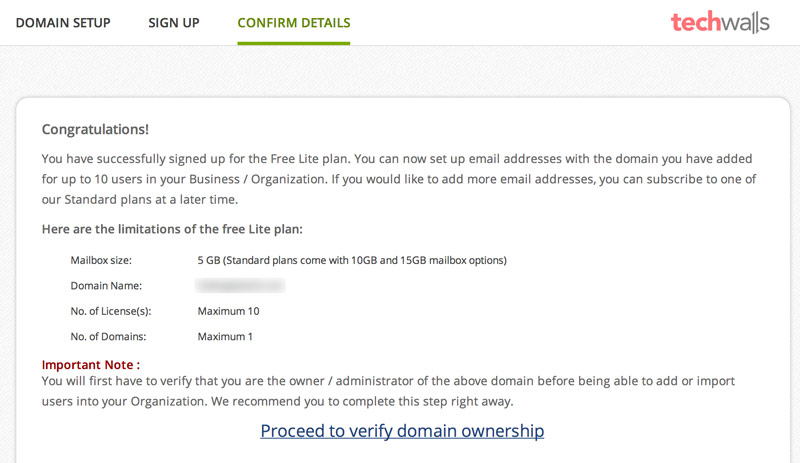
Confirm details of your account and click on “Proceed to verify domain ownership” to continue.
You can verify your domain easily using one of the 3 methods, adding a CNAME record, adding a TXT record or uploading an HTML file to your site.
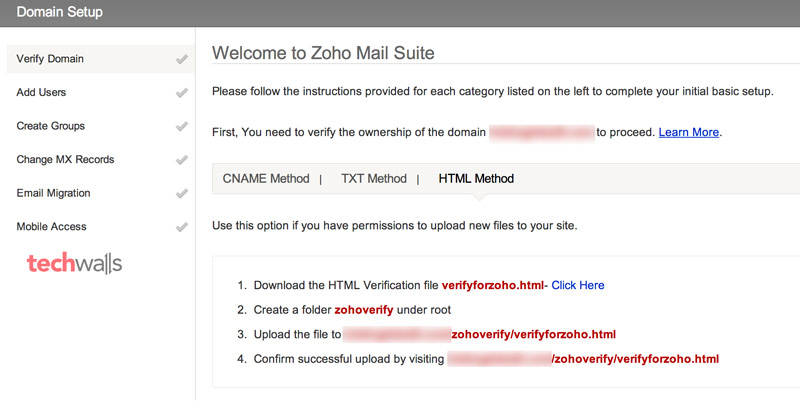
After verification, you can enter your username which is the administrator email account.

In the next step, you will need to add some new MX records. This is the most important step and you should strictly follow the instructions so that you can send or receive emails properly. Now, click on “Proceed to Point MX”
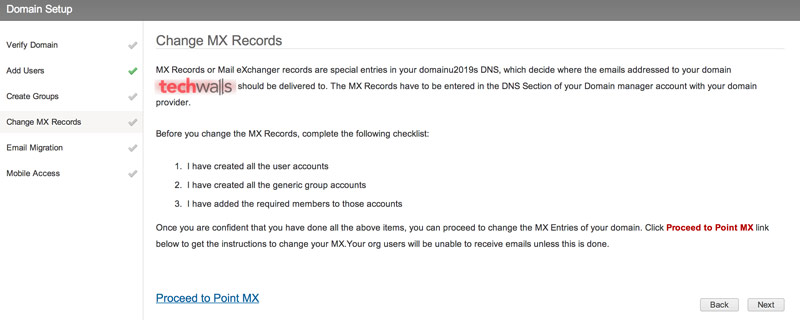
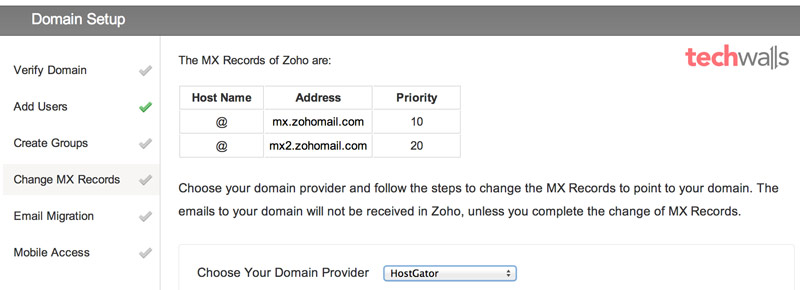
You will see the MX records that you need to change on your server. You can click on the drop down list on the bottom to see detailed instructions for your hosting provider.
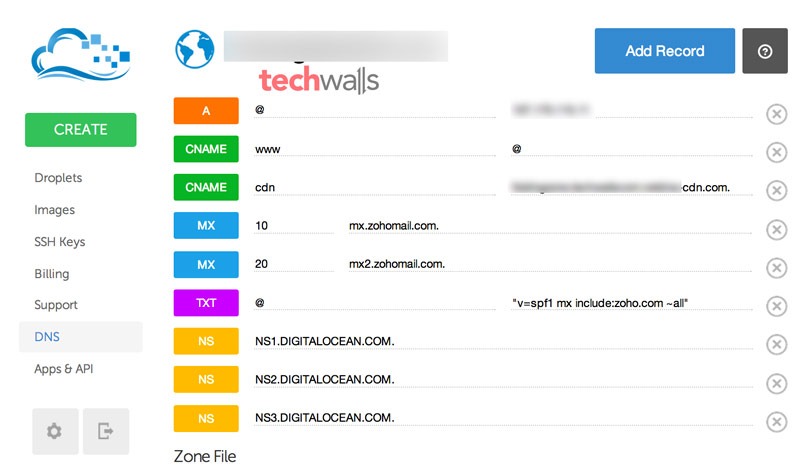
As I’m using DigitalOcean, I can easily add the new MX records by going to my dashboard and choose DNS to edit my domain. Then I added the two MX records as shown above. Make sure to add a trailing dot at the end of those addresses. In this step, you should also add a SPF record (Sender Policy Framework) to identify which mail server is authorized to send email on your domain. You will just need to add a TXT record with the following “value: v=spf1 mx include:zoho.com ~all”. Notice that the quotes must be included.
You are almost done. The next step is to migrate your email from your existing server. You can ignore this step if you don’t need your old emails or you are creating a new custom email address on your domain.
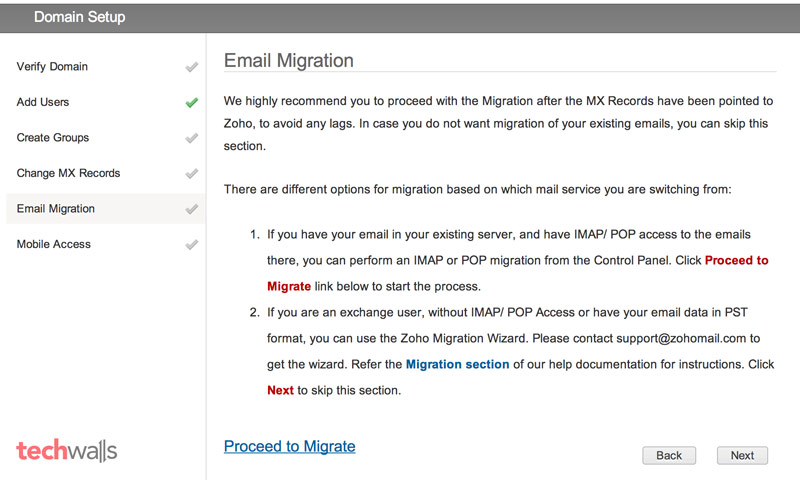
You will be navigated to your account’ control panel where you can manage users, groups, access to different services, etc.
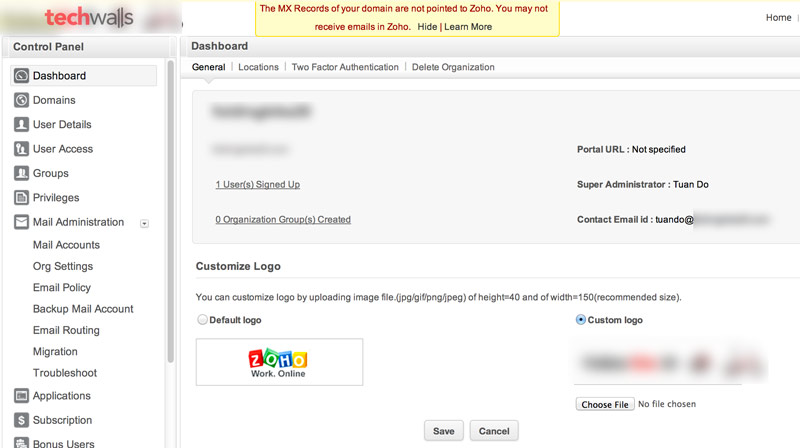
Now, you will need to wait a few hours for the MX records to propagate. Then you can start trying the web interface of Zoho Mail here or install its mobile app to use it on your smartphone.
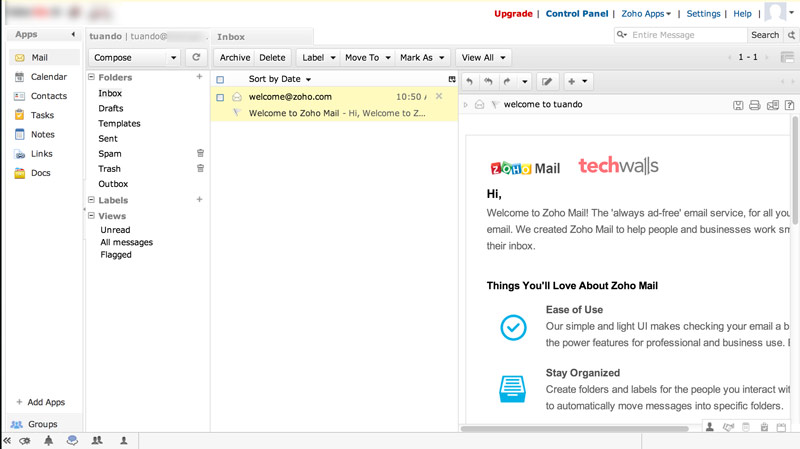
If you prefer accessing your emails on email clients like Mozilla Thunderbird or Microsoft Outlook, you can easily configure it to work because Zoho supports both IMAP and POP. Make sure to enable those options in your Zoho Mail account’s settings (Settings -> Mail -> Email Forwarding and POP/IMAP). After that, you can configure your email client as below:
POP:
Incoming Server Settings:
Incoming Server Name: pop.zoho.com
Port: 995
Require SSL: YesOutgoing Server Settings:
Outgoing Server Name: smtp.zoho.com
Port: 465, SSL or
Port: 587, TLS
Require Authentication: Yes
IMAP:
Incoming Server Settings:
Incoming Server Name: imap.zoho.com
Port: 993
Require SSL: YesOutgoing Server Settings:
Outgoing Server Name: smtp.zoho.com
Port: 465 with SSL or
Port: 587 with TLS
Require Authentication: Yes
That’s all. Now you can start using your domain email for free. Leave a comment below if you have any problem setting up your Zoho Mail account.
Disclosure: We might earn commission from qualifying purchases. The commission help keep the rest of my content free, so thank you!



Alex Bergsland says
Thank you!
I’ve been pulling my hair trying to make my NAS a mail server to no avail but this is a much smoother solution!
It took me about 15 minutes to setup the Zoho Mail account and point my domain to it.
kwame says
looks like the free account dont work for new domains.
* New domain registration available only with Standard and Premium plans.
For special requests or further clarifications, please contact sales.
Larry says
Thanks for the wonderful post. I have tried the process and have set it up. The only problem I notice, is that, I can send mail but can receive from other email provider. Is there a way around this. Also my domain and host are from too different providers
Tuan Do says
I’ve used Zoho Mail for years without any problem. Have you set up the MX records correctly?
Felix Brunner says
Free accounts work with existing domains. But for newly created accounts on the free plan IMAP and POP3 cannot be enabled anymore
kashmiri says
Yandex Mail offers up to 1,000 user accounts in own domain for free, complete with POP3 andnd IMAP. Their setup is quirky and domain validation takes longer than it should, but eventually things work more or less smoothy.