CDN (Content Delivery Network) services have become much more popular in recent years as they are the most effective way to improve page speed. However, many webmasters find it difficult to get started with CDN because most of those services are still expensive, especially for small businesses.
KeyCDN is almost the most affordable solution on the market, I will have an insightful review of the service in an upcoming post. In this article, we will show you some easy steps to set up KeyCDN on WordPress websites.
1. Create a Pull Zone
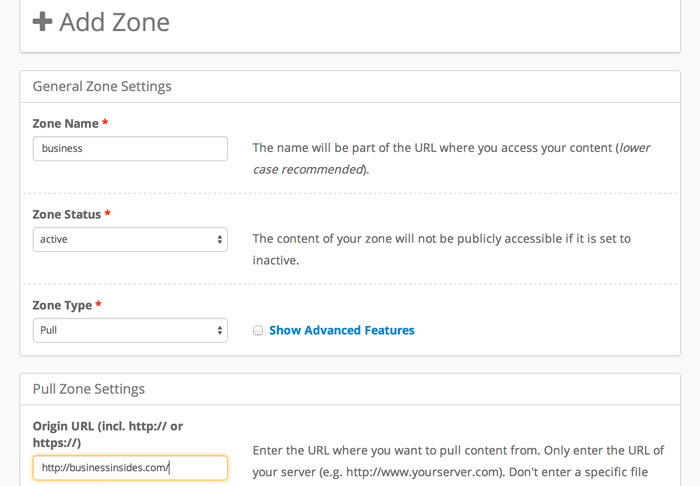
Log in to your KeyCDN Dashboard, choose Zones on the left sidebar to create a new Pull Zone. Make sure to choose Zone Type as Pull.

You will get a Zone URL on the next screen, for example, mine is business-a7c.kxcdn.com. You can use this URL or add a new CNAME record in your hosting pointing to this URL to make it cleaner. You might have to wait a couple of hours for the CNAME record to get reflected.


2. Install W3 Total Cache plugin
Go to your WordPress Dashboard -> Plugins and install the W3 Total Cache plugin
3. Enable CDN
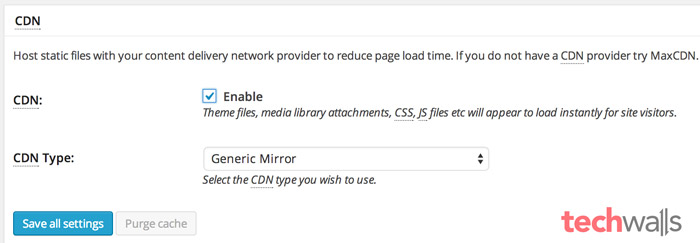
You can see a new Performance tab on the left sidebar of your Dashboard. Click on this tab and choose General Settings, then scroll down to look for the CDN section. Click on the checkbox to enable CDN and choose Generic Mirror for CDN Type. Click on Save all settings.

4. Set up CDN
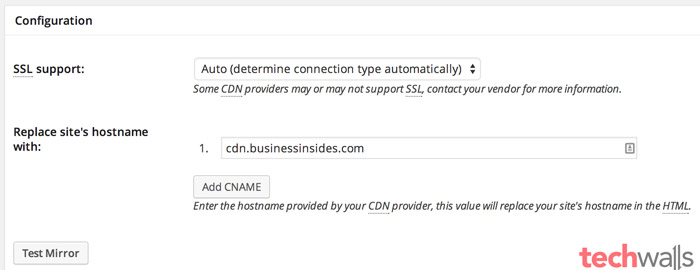
Now, go to the CDN tab on top menu or the CDN tab under Performance. Scroll down to the Configuration section, enter your Zone URL or the CNAME you created in the first step. Click on Save all settings button.

All done. Now your website starts being served with the KeyCDN’s servers. Check out my review of the service if you are interested.


