Your Mac is a powerhouse for networking and sharing. From the usual capabilities that we are used to, like the ability to share printers to unique features like AirDrop, Mac allows for multiple ways to share between computers. However, not all Mac users know where these opportunities lie.
Today, we will go over the multiple ways Mac facilitates sharing between computers within your network.
Sharing Your Printer/Scanner
Having a shared printer or scanner is helpful for many reasons. Office employees in a large company would usually have an in-house technical individual who can implement a shared printer for the office.
However, chances are, if your company uses a Mac, you are a smaller company. If you are a smaller company, you might not have an in-house technical person. Lastly, families benefit the most from a shared printer or scanner in the home. If you are looking to install a printer/scanner in your home or office to share, here are the steps you need to know.
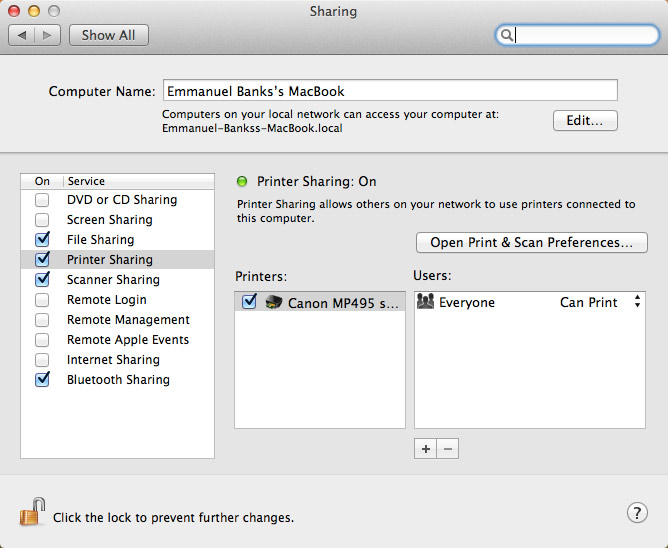
- The steps begin system preferences. First, you must find the option for Print & Fax.
- Then, you will find a list of printers you’ve connected previously with your Mac. Click on the one you are looking to share.
- You will then find an option to “Share this Printer on the Network”; click it.

This makes it possible to share your printer with all individuals within your local WIFI network.
Internet Connection Sharing
Sharing your Internet connection is the most common situation you may be placed in. However, we aren’t talking about just creating a WIFI connection for your home computers. Most individuals don’t know that you are able to create a wireless access point emitted from your Mac itself.
- The connection doesn’t come from the air. You must have an ethernet connection to begin with. Connect the cord to your Mac.
- Then, in preferences, click on “Sharing”
- In the menu to the left, find “Internet Sharing” and click on it.
- Under “Share your connection from:”, choose “Ethernet” and To computers using: “AirPort” or “WIFI”
- Select “WIFI Options”, create a network of your own. Make sure it’s secure with 128-bit WEP to require a password. Then click “OK”, and then “Start”
File Sharing and Shared Folders
File sharing on Mac is the most dynamic in the amount of ways and portals in which one can share files on Mac. However, another way Mac allows for you to deal with folders is through creating a shared folder on Mac. This allows for individuals within your network to add too and make changes to a folder that you add Users to.
Airdrop
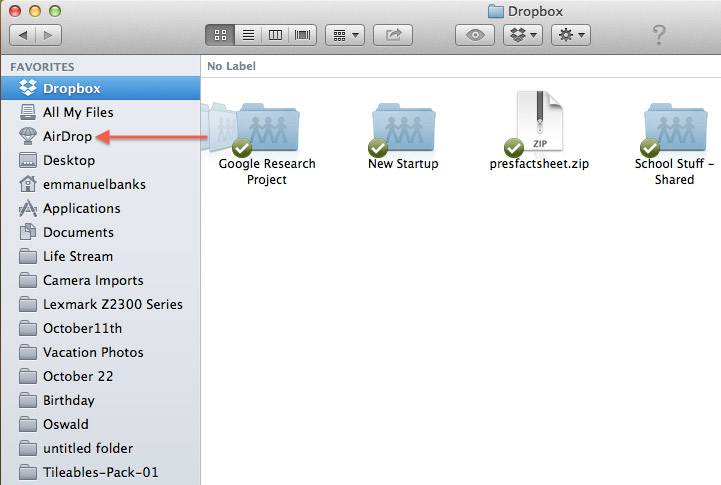
AirDrop is the way OS X users are able to easily share folders within their WIFI/ethernet network. This provides ease in file sharing instead of having to rely on email or the common Bluetooth route. To use AirDrop, simply go to the Finder folder. On the left side of Finder, locate the “AirDrop” option. From there, wait for users in your network to show up. When they do, you can simply drag and drop the folders you’d like to share over the user. It will begin to download and the user will be presented with the option to either “save”, “reject”, or “save and open”.

Other Means
In System Preferences, search for “File Sharing” and then press enter. From there, on the left side of the Sharing screen, check the “File Sharing” box. From there, under the “Users” section, click the “+” to add individuals you’d like to have shared folders for. Add the folders under the “Shared Folders” section. It’s as simple as that.
Disclosure: We might earn commission from qualifying purchases. The commission help keep the rest of my content free, so thank you!


