DigitalOcean has become a prominent cloud hosting service recently. Many bloggers/webmasters have moved their sites from shared hosting plans to DigitalOcean because it is offering SSD cloud server for a very affordable price. The only obstacle is that this is an unmanaged VPS, meaning you will have to set up the server and deal with technical stuffs to keep it running.
I don’t know much about VPS but I’ve learnt a lot from setting up my website on DigitalOcean. Here are all the steps I did to move my WordPress websites to DigitalOcean. If you are not sure how to work with the service, just follow these simple steps:
1. Create a backup
The first step is to create a backup of your database and files. While you need a full backup of database, you don’t need to save all WordPress files. The Wp-content directory is the most important one because it includes your themes, plugins and images.
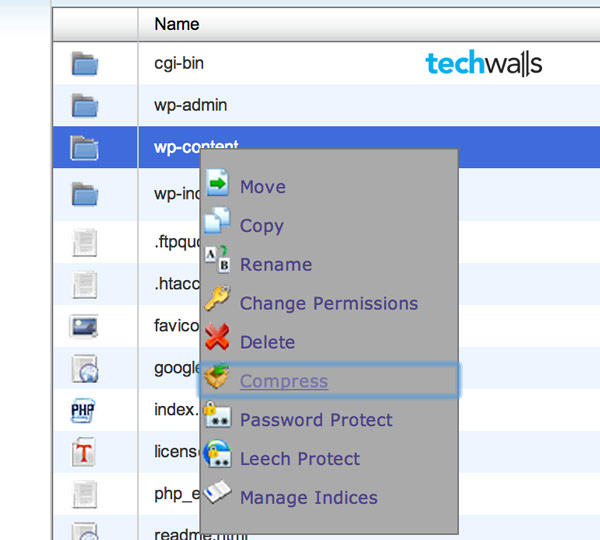
It’s quite easy to create a backup in shared hostings as they use CPanel. Just go to File Manager to compress and download your files, then go to Create Backup in Backups Manager to save your database.

2. Create a droplet (cloud server)
Sign up for a DigitalOcean account and start creating your first droplet. I chose the cheapest plan of $5/month, the plan includes 512MB of RAM, 20GB SSD Disk and 1TB Transfer. I select New York 2 as the region, choose Ubuntu 14.04 x64 under Select Image and tick on Enable VirtIO and Enable Backups which costs more 20%. Then click on Create a droplet, you will have to wait around 30 seconds for the process to complete. Then you will receive an email including credentials like IP address, username and password.
You might also want to create a SSH key for better security. Just follow the commands below.
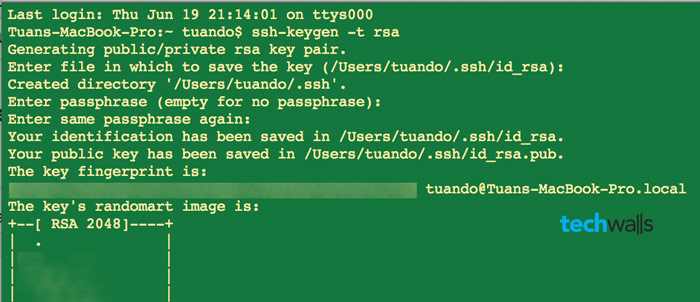
Copy the key to your server:
cat ~/.ssh/id_rsa.pub | ssh tuando@your_server_IP_address “mkdir -p ~/.ssh && cat >> ~/.ssh/authorized_keys”
The next time you login, you will be asked to enter passphrase you set above. After that, you won’t be required to enter any password when logging in from your machine.
Now, type this command to get the full key.
cat ~/.ssh/id_rsa.pub
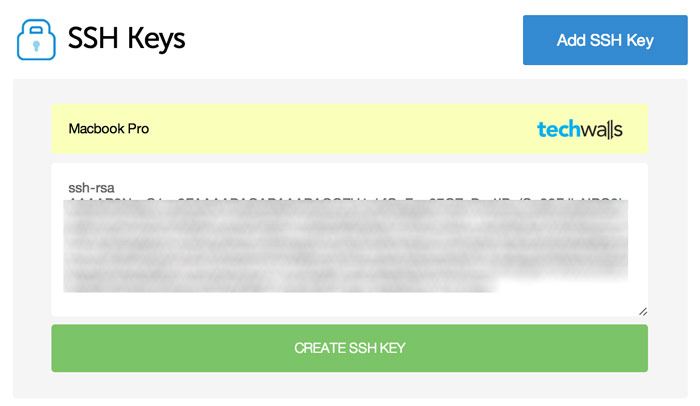
Then copy the key and paste it to SSH page on DigitalOcean:
3. Set up your server
Connect to your server:
ssh root@server_ip_address
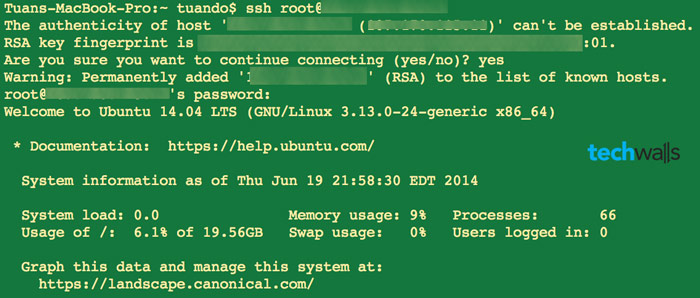
You will see a message saying that the authenticity of host can’t be established. This is alright as your computer can’t recognize the remote server in the first connection. Just type yes to continue.
Create a new user to avoid accident destructive changes to your server:
adduser tuando
There will be some questions after that, but you can skip most of them. Next, you will need to assign some administrative privileges to the new user. Type the command below to open configuration file:
visudo
Add one more line under the User privilege specification section, like below:

Press Control+X to exit, then type Y to save the file. Now you can log in with the new user’s credentials.
4. Install LAMP stack (Linux, Apache, MySQL, PHP) on Ubuntu
Install Apache with these commands:
sudo apt-get update
sudo apt-get install apache2
Type in your server’s IP address in a web browser, you should see something like this:
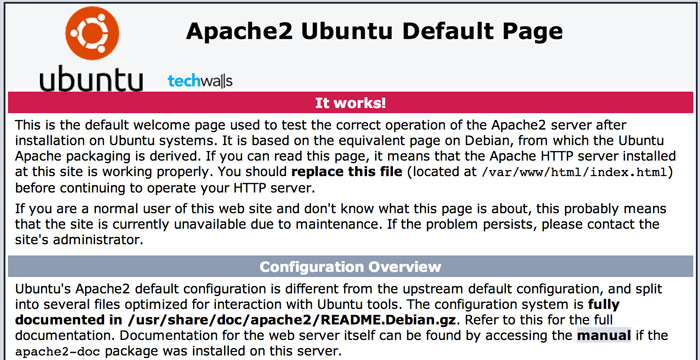
Install MySQL with the command below. You will be asked to set a password for the MySQL root user.
sudo apt-get install mysql-server libapache2-mod-auth-mysql php5-mysql
Create a database directory structure to store information, and run a simple security script:
sudo mysql_install_db
sudo mysql_secure_installation
You will be asked to set a new password but you set it already, so you can choose no. For other questions, just press Enter to accept default values.
Install PHP:
sudo apt-get install php5 libapache2-mod-php5 php5-mcrypt
Open dir.conf file:
sudo nano /etc/apache2/mods-enabled/dir.conf
Move index.php to before index.html:
DirectoryIndex index.php index.html index.cgi index.pl index.xhtml index.htm
Restart Apache server:
sudo service apache2 restart
Install some PHP modules:
sudo apt-get install php5-cgi php5-cli php5-common php5-curl php5-gd libssh2-php
5. Install and set up WordPress sites
Create database and user for each WordPress site:
mysql -u root -p
In MySQL prompt, type in:
CREATE DATABASE Database1;
CREATE DATABASE Database2;
CREATE USER User1@localhost;
CREATE USER User2@localhost;
SET PASSWORD FOR User1@localhost= PASSWORD(“Password1”);
SET PASSWORD FOR User2@localhost= PASSWORD(“Password2”);
GRANT ALL PRIVILEGES ON Database1.* TO User1@localhost IDENTIFIED BY ‘Password1’;
GRANT ALL PRIVILEGES ON Database2.* TO User2@localhost IDENTIFIED BY ‘Password2’;
FLUSH PRIVILEGES;
exit;
Create directories for sites, make sure you have permissions to access those directories and WordPress can upgrade, upload files properly.
cd /var/www
sudo mkdir Site1
sudo mkdir Site2
sudo chown www-data:your_user_name * -R
Open a new Terminal and type in the commands from your local computer:
scp ~/Downloads/wordpressfilesSite1.zip tuando@server_ip_address:/var/www/Site1
scp ~/Downloads/wordpressfilesSite2.zip tuando@server_ip_address:/var/www/Site2
Come back to the terminal on your server, extract your WordPress files:
sudo unzip /var/www/Site1/wordpressfilesSite1.zip -d /var/www/Site1
sudo unzip /var/www/Site2/wordpressfilesSite2.zip -d /var/www/Site2
Edit the wp-config.php with database name, database user and password you’ve just created above:
sudo nano /var/www/Site1/wp-config.php
sudo nano /var/www/Site2/wp-config.php
Install PHPMyAdmin:
sudo apt-get install phpmyadmin
Choose apache2 and use dbconfig-common. Continue with these commands:
sudo php5enmod mcrypt
sudo service apache2 restart
Now you can go to http://domain_name_or_IP/phpmyadmin to import your database. If you receive an error saying that the file size exceeded the maximum size permitted, you’ll need to modify the php.ini file:
sudo nano /etc/php5/apache2/php.ini
Find corresponding values and increase like below:
upload_max_filesize = 64M
post_max_size = 64M
max_execution_time = 300
Then, restart your apache2 server:
sudo service apache2 restart
6. Add domain in Digital Ocean
Add domain in DigitalOcean:
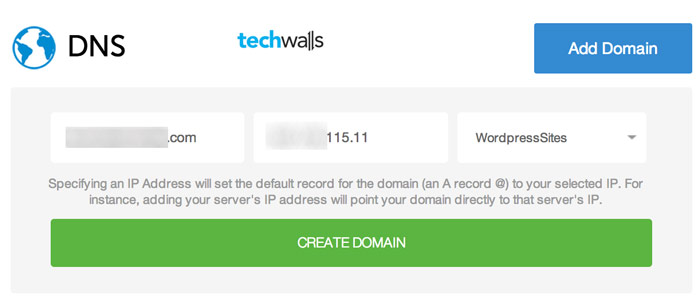
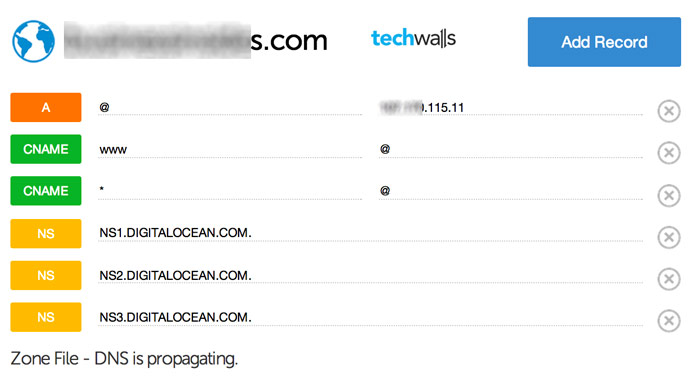
7. Configure Apache Virtual Host
cd /etc/apache2/sites-available
sudo cp 000-default.conf Site1.conf
sudo cp 000-default.conf Site2.conf
Configure first site:
sudo nano Site1.conf
Change the content to something like this:
<VirtualHost *:80>
	ServerAdmin [email protected]
	ServerName Site1.com
	ServerAlias www.Site1.com

	DocumentRoot /var/www/Site1
	<Directory />
		Options FollowSymLinks
		AllowOverride None
	</Directory>
	<Directory /var/www/Site1>
		Options Indexes FollowSymLinks MultiViews
		AllowOverride All
		Order allow,deny
		allow from all
	</Directory>
Configure similarly to the second site. Then enable the 2 virtual host files:
sudo a2ensite Site1.conf
sudo a2ensite Site2.conf
sudo a2enmod rewrite
sudo service apache2 reload
8. Change Domain Name Servers
Change name servers in control panel of your domain registrar, point them to:
ns1.digitalocean.com
ns2.digitalocean.com
ns3.digitalocean.com
You are all set now. You will just need to wait a couple of hours for the DNS propagation to complete.
Let me know if you have any problem setting up WordPress on DigitalOcean. Also leave a comment if you have any suggestion, I’d love to learn more from you guys.
Disclosure: We might earn commission from qualifying purchases. The commission help keep the rest of my content free, so thank you!



Joseph says
Can you please tell me what panel you are using with WordPress?